New Year’s Eve always feels special, and I believe your space should match that feeling, too. I’ve put together these New Year’s Eve decoration ideas to help you create something fun and personal at home.
You don’t need fancy tools or a big budget to make it work.
In this guide, I will share simple DIY ideas, creative setups, and easy ways to decorate each part of your home. You’ll find ideas for walls, tables, balloons, and even outdoor spaces.
I’ve also included helpful tips so you can plan better and avoid common mistakes that waste time.
I’ve tried many of these ideas myself, so they are easy to follow and practical. Some take just a few minutes, while others let you add a personal touch.
Let’s get into it and make your space feel fresh, fun, and ready for guests.
Why DIY Decorations Make Your Celebration More Personal
DIY decorations make a celebration feel more meaningful because each piece reflects real effort and thought.
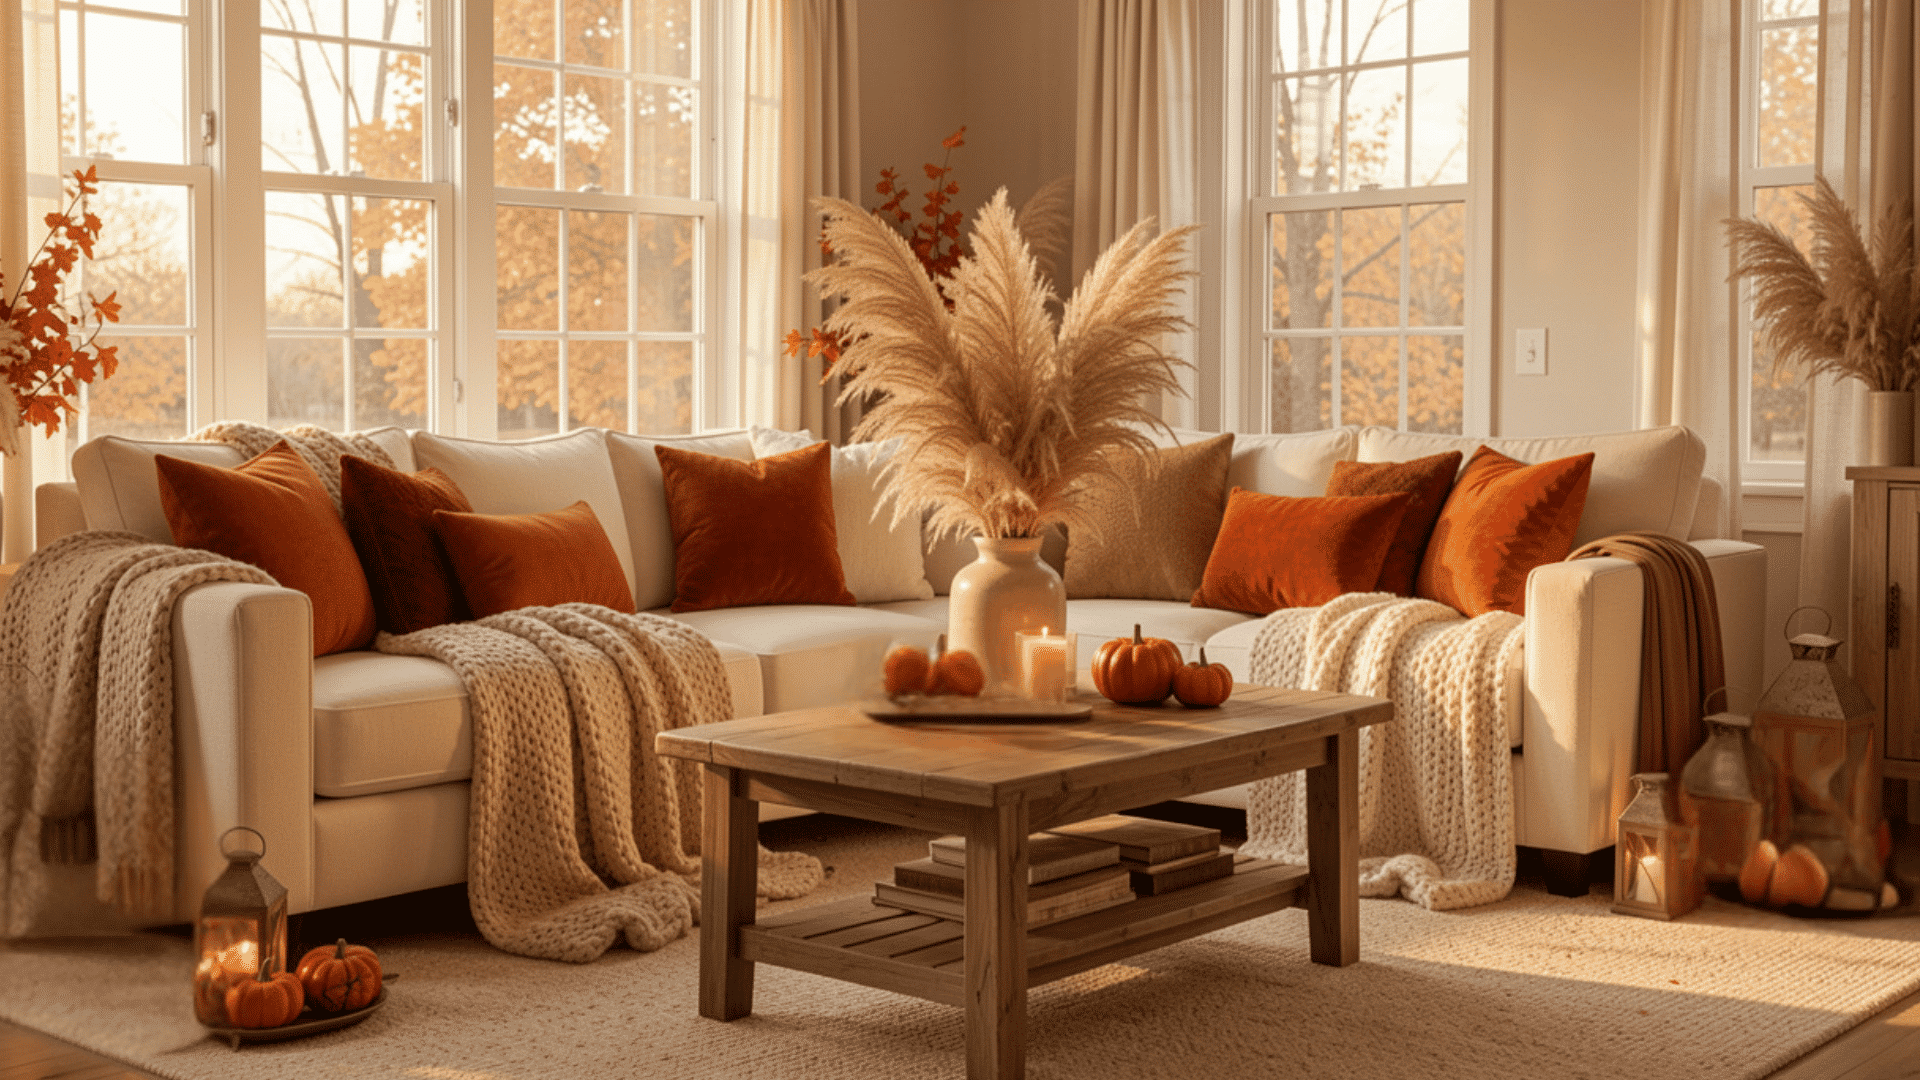
They bring a sense of identity that ready-made items often miss, especially when paired with cozy winter decor like warm lights, soft textures, and seasonal colors.
When decorations are made by hand, they can include memories, favorite shades, or small details that matter.
This makes the space feel more connected to the moment and creates a warm, welcoming atmosphere for guests.
DIY also gives you full control over style and budget. Materials can be reused, and ideas can shift based on space, making the process more flexible and practical.
Another key benefit is creativity. Simple items can become unique, helping your setup feel special while remaining comfortable and natural for everyone.
How to Choose the Perfect Theme
Set the tone for your celebration by planning details that feel cohesive and easy to follow. A clear direction helps your decor look polished and well-put-together.
- Color Scheme Selection: Choose a palette like gold and black for a classic feel or bright colors for a fun vibe. Keep it consistent across all decorations.
- Party Style Matching: Think about the type of gathering you’re hosting, family night, elegant dinner, or casual party, and align your decor with that mood.
- Mix of DIY and Ready-Made Decor: Combine handmade pieces with store-bought items to save time while still adding a personal touch to your setup.
- Space Planning and Layout: Look at your room size and decide where key decor will go, like walls, tables, and entry areas, to avoid a crowded look.
- Lighting and Mood Setup: Use fairy lights, candles, or LED strips to create a warm, festive feel that brings your theme together.
Easy DIY New Year’s Decoration Ideas at Home
Turn any corner of your home into a midnight celebration with materials you already own. A few hours and some imagination go further than a shopping cart.
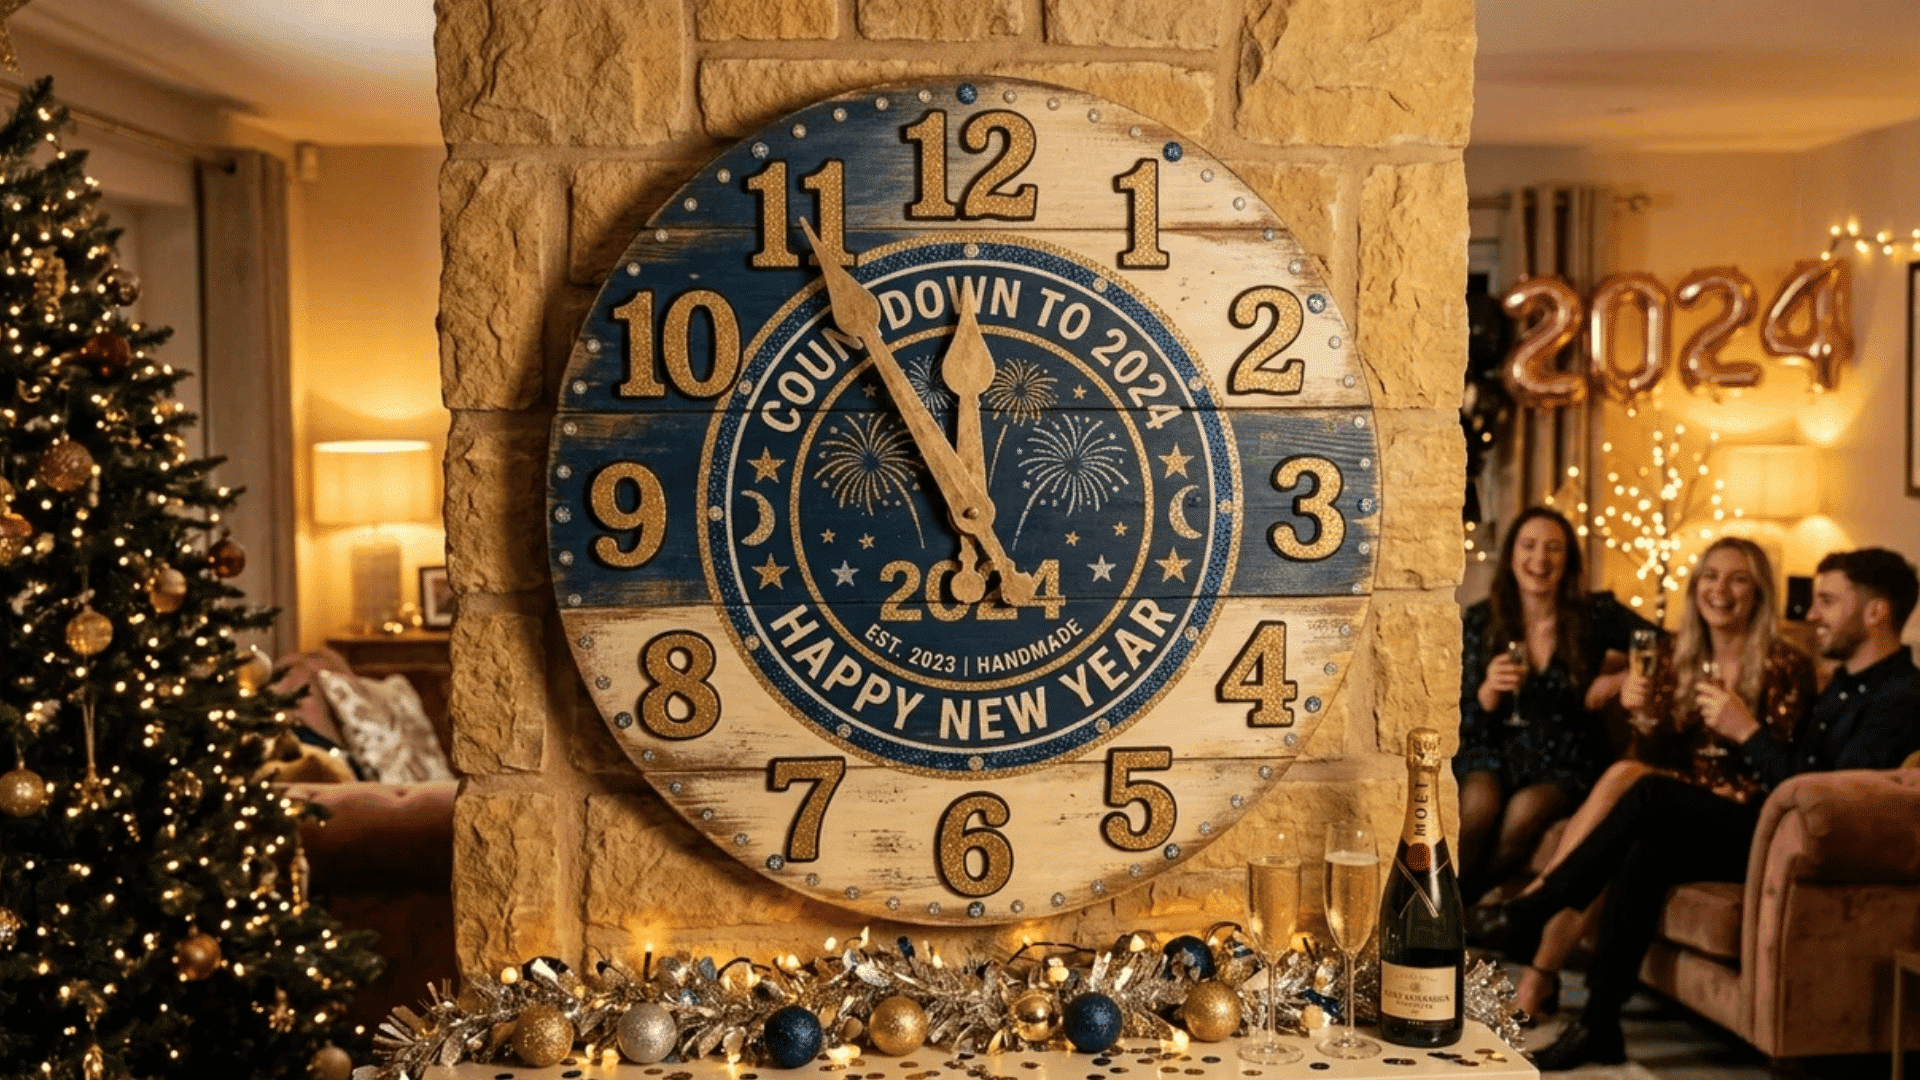
1. DIY Midnight Clock Wall With Moving Hands
Last New Year’s Eve, I grabbed a pizza box, some black craft paint, and two chopsticks. Forty minutes later, I had a working cardboard clock face mounted above my living room couch.
The hands were cut from thick cardboard, connected with a brass paper fastener, and I moved them by hand as midnight approached.
Nobody believed it was scrap material. The clock face was painted with chalk-white numbers, the background was matte black, and the whole thing cost me nothing.
Here are a few things that made it work better:
- Use a compass or a large dinner plate to trace a perfect circle on cardboard
- Gold or silver metallic paint for the numerals makes a big difference against black
- A brass brad (paper fastener) works as the pivot costs under a dollar at any stationery shop
- Set the hands to 11:55 PM when guests arrive, and move them to midnight together as a group countdown
2. Hanging Photo Timeline of the Year
Pull out your phone’s camera roll. Print twelve photos, one per month, at 4×6 size from any photo printing app or local shop.
Clip them to a length of jute twine with wooden pegs, with the oldest month on the left and December on the right. Label each with the month name on a small tag.
When guests walk through, they walk through your year. It works as both a decoration and a conversation starter. The whole setup takes under an hour.
String lights tucked behind the twine line give it a warm, backlit look that photographs well after dark.
Keep these points in mind for the best result:
- Matte prints show fewer fingerprints than glossy ones at a party
- Use consistent photo sizes so the line looks intentional, not random
- Small kraft paper tags written with a brown ink marker give it a vintage look
- Leave a blank tag at the end for guests to write a New Year’s wish
3. Glow-In-The-Dark Countdown Stickers
Here is what nobody tells you about glow-in-the-dark sticker sets: you can make your own.
Cut out number shapes from white cardstock, paint them with phosphorescent paint (available at most hobby stores), and charge them under a bright light for 30 minutes before the party.
Stick them on walls, windows, and ceilings using removable adhesive putty. When the lights go out at midnight, the numbers glow green across every surface.
It looks like a different room entirely. Children go absolutely silent when the lights drop.
A few additions that take this further:
- Phosphorescent paint is sold in small tubes at craft stores for under four dollars
- Cut numbers in descending order, 10 through,1 for a countdown display
- Place them in a spiral pattern from the ceiling down to the floor for a dramatic drop effect
- Removable adhesive putty leaves no marks and peels off cleanly the next morning
Budget-Friendly New Year’s Decor You Can Make
Old newspapers and bottle caps are better decoration materials than most people give them credit for. The results look handmade in the best way, a y specific, textured, and nothing like a store shelf.
4. Newspaper “Year In Review” Wall Art
Tear out twelve headlines from newspapers or magazines published across the past year one per month, or just ones that made you stop and read.
Arrange them in a grid on a large sheet of craft paper and glue them down with a thin layer of Mod Podge.
Frame the whole thing in a cheap clip frame or tape it to the wall. The result is both nostalgic and genuinely interesting.
My client tried this with their family last year and said guests stood in front of it for 20 minutes, reading and arguing over which stories they remembered. That is the whole point of the piece.
Some tips before you start:
- Tear the edges rather than cutting them, which gives the collage an organic, layered look
- Highlight one or two headlines with a yellow marker to draw the eye
- Add small handwritten notes in the margins about your personal memory of each event
- A light wash of watered-down white paint over the finished collage gives it an aged look
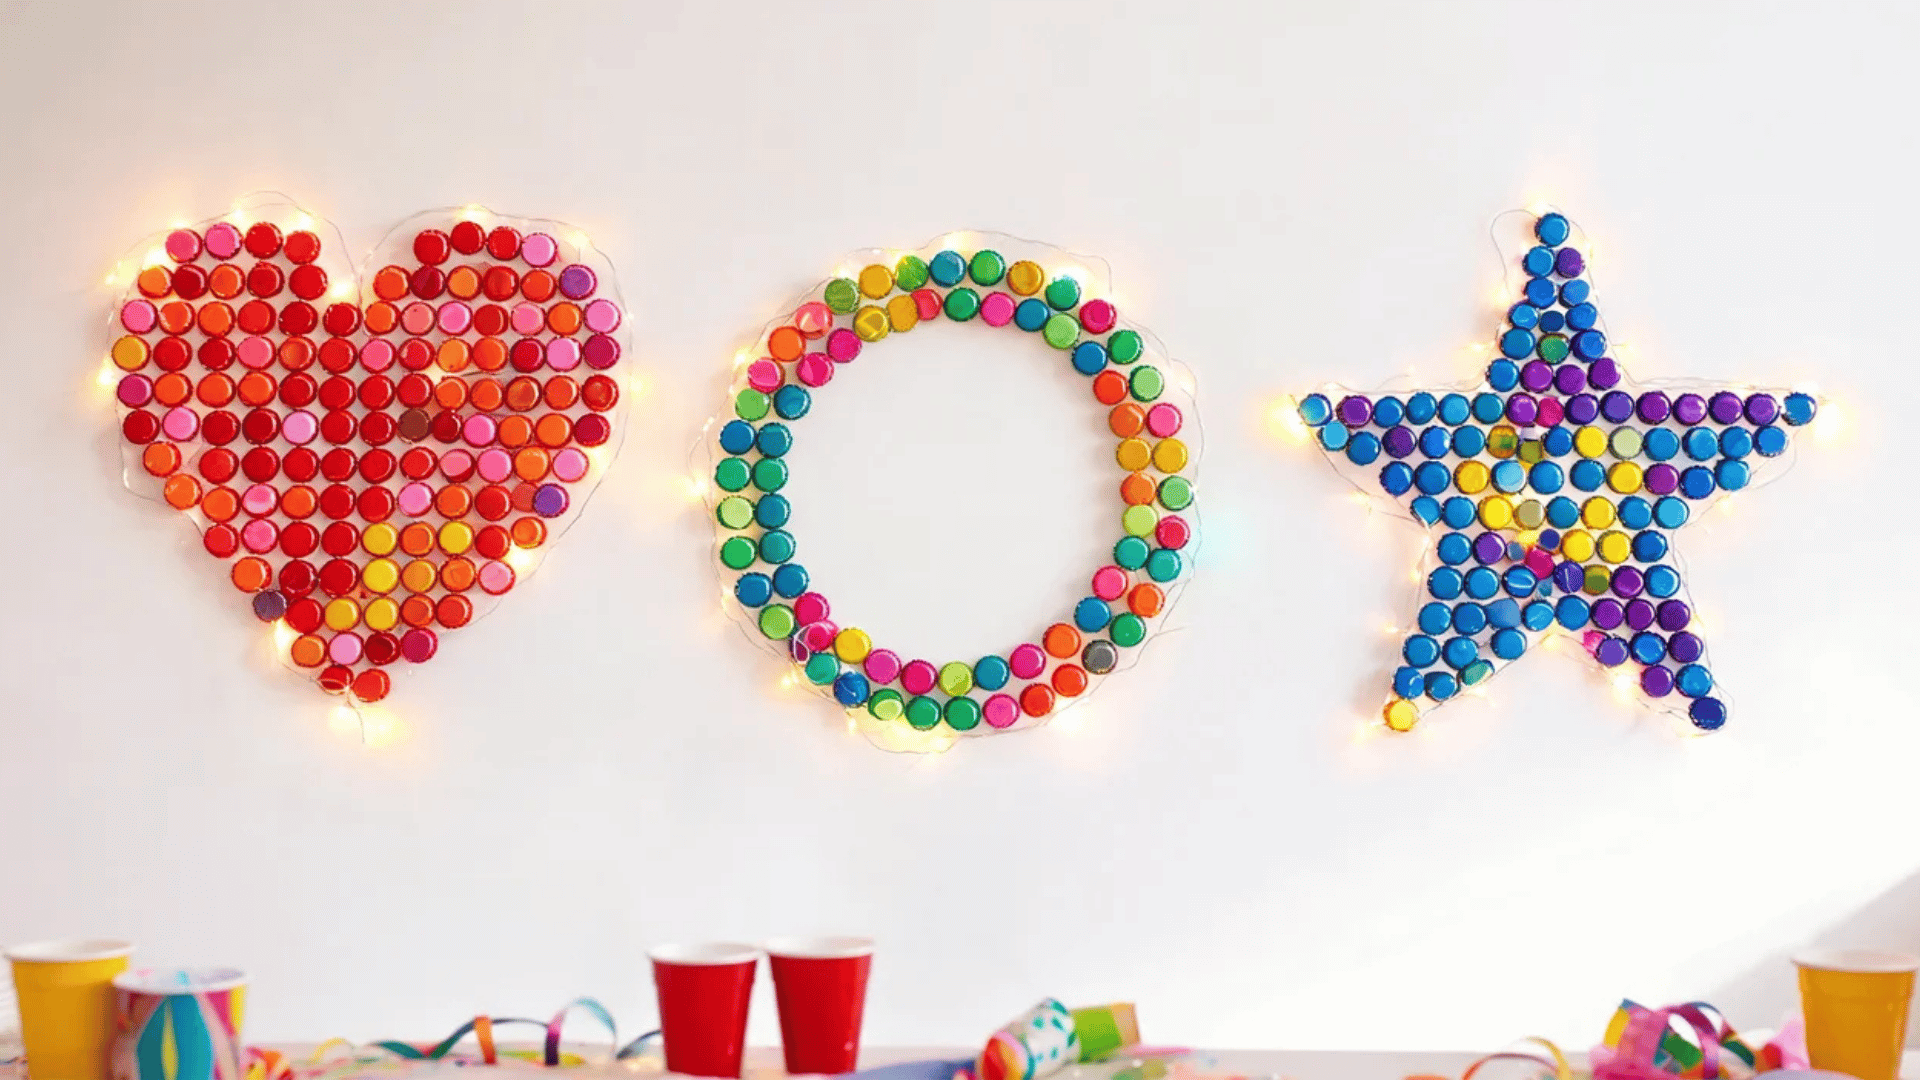
5. DIY Bottle Cap Confetti Art
Save bottle caps for two weeks before the party: beer, soda, juice, anything round. Spray paint them all gold or silver.
On a large canvas board or a piece of MDF, arrange them into the numerals of the new year: for example, 2026 spelled out in bottle caps, glued flat.
The texture is surprisingly rich up close. It catches light from multiple angles.
A friend of mine made one of these on a whim, and it ended up as the photo backdrop everyone used. The full project takes about ninety minutes, and the materials cost almost nothing if you have been collecting caps.
Worth noting before you start gluing:
- Spray paint in a ventilated area, and let the caps dry fully before arranging
- Use strong epoxy or a glue gun for the caps. PVA glue is too weak for metal
- Back the board with black velvet paper for a high-contrast look
- Mark the arrangement lightly in pencil before committing to glue placement
6. Old CD Reflective Wall Decor
A stack of old CDs hung on a wall creates a mirror-ball effect without a mirror ball. Thread fishing line through the center holes and hang them at different heights from a wooden dowel.
Turn a lamp toward them. The reflections scatter across every surface in the room when people move past.
My friend tried this at their apartment party with about thirty CDs. The total cost was a spool of fishing line, and the photos from that night look like they were taken in a proper venue.
The rainbow light scatter that CDs naturally produce is hard to replicate with anything else.
A few things to note:
- Hang CDs at alternating heights; a variety in depth creates more scattered light than a flat row
- A rotating desk fan aimed gently at the arrangement keeps them spinning slowly
- Mix shiny and matte-side-out for different light qualities
- Add small baubles or metallic beads between CDs on the fishing line for extra texture
Creative New Year’s Party Decoration Ideas
The decorations that get talked about at parties are the ones that do something, hold a note, hide a surprise, or release a wish.
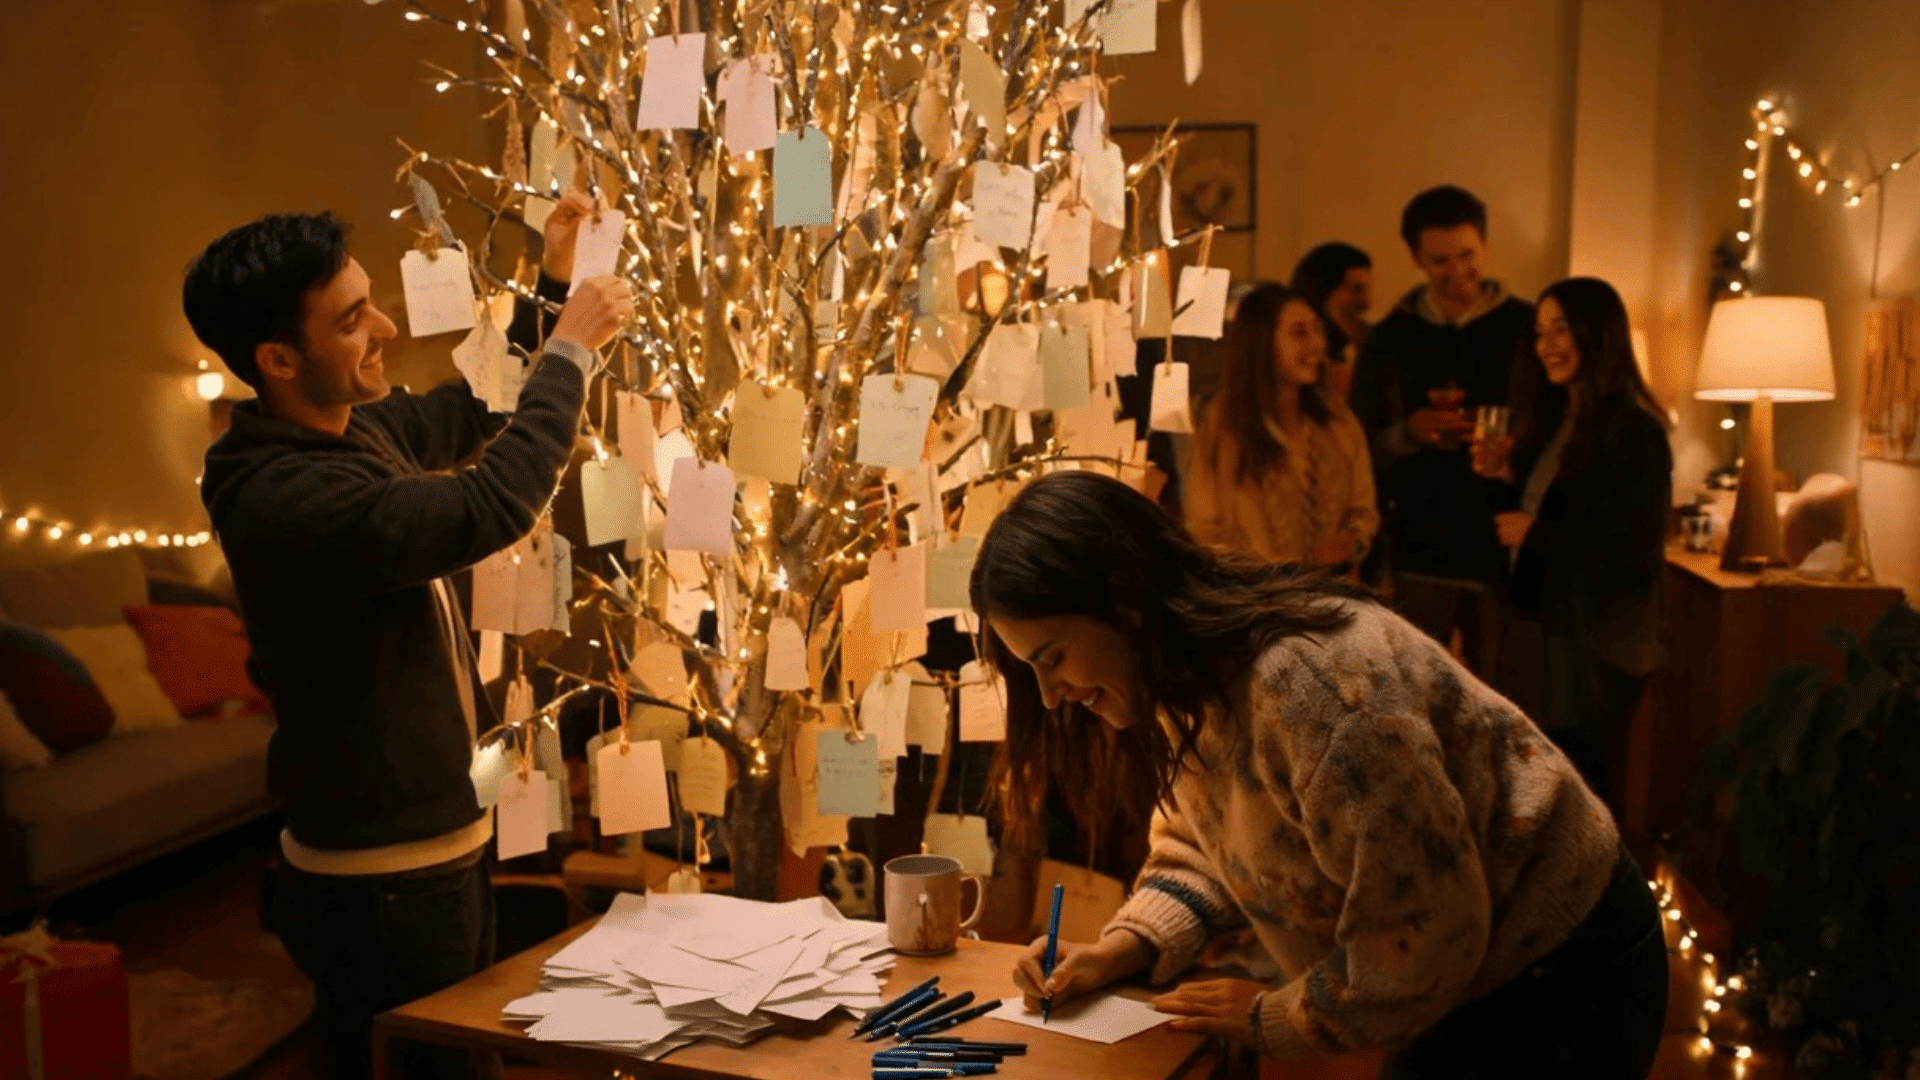
7. Resolution Tree With Hanging Notes
A bare branch collected from the garden or bought dried from a florist, planted in a pot of sand or stones, works as the tree base.
Cut small tags from cardstock, leave a pen tied with twine on the table beside it, and let guests write their one resolution for the year.
They hang it on a branch themselves. By midnight, the tree is full. It becomes a genuinely meaningful object, personal in a way no store-bought decoration is.
My client set one of these up at their office’s New Year’s party, and some colleagues were still talking about their resolution tags three months later.
Notes on making this work well:
- Use Kraft brown tags for a natural look, or gold cardstock for something more festive
- Pre-hang a few blank tags so guests understand immediately what to do
- Add a small star or moon stamp on each tag before the party as a design touch
- Photograph the finished tree at midnight so guests have a record of all the notes
8. “Pop The Year” Balloon Surprise Wall
Cover an entire wall in balloons, ideally one for each guest. Inside each balloon before inflating, tuck a small paper note: a prediction for the new year, a dare, a compliment, or a question.
Guests pop them at midnight and read their note aloud. The wall itself looks like a celebration, and the moment of popping is genuinely dramatic.
Use a mix of gold, black, and white balloons to keep the palette clean. The noise of thirty balloons popping simultaneously at midnight is deeply satisfying in a way that is hard to explain until you experience it.
A few details that help the setup:
- Write notes on thin paper and roll them tightly so they sit flat inside the balloon
- Use a thumbtack on a stick as a communal popper rather than having everyone scramble for pins
- Mix in a few balloons with nothing inside, the surprise of an empty one gets a laugh
- Tape the balloons in tight clusters rather than spread out, so the wall looks full and intentional
9. Wish Lantern Corner (Paper Version)
Since sky lanterns pose a fire hazard, make paper versions instead. Fold white tissue paper into lantern shapes. There are clear tutorials available online, and hang them from the ceiling with clear thread at different heights.
Place a small battery tea light inside each lantern. The effect is a glowing cloud of lanterns overhead.
Set up a wishing station beneath them: a small table with paper strips and a pen where guests write their wishes before the new year.
Collect the strips in a glass jar under the lanterns. The corner becomes the quietest, most meaningful spot at the party.
Practical points:
- Battery tea lights in warm white look better than cool white inside tissue paper
- Clear fishing line makes the lanterns appear to float without visible support
- The wishing station table works well with a single candle and a small plant for warmth
- Save all the written wishes in the jar and open it together at next year’s party
New Year’s Eve Decorations for a Stylish Look
Restraint does more work than abundance when the goal is a polished look. Each of these three setups uses a limited palette and careful placement to create something that reads as genuinely considered.
10. Floating Candle Bowls With Numbers
Wide glass bowls, the kind used for salads or fruit, filled with water and floating candles, create a centerpiece that is both calm and warm.
Write the year’s number on small card circles cut from gold card stock and float them alongside the candles. Group three bowls at different heights using stacked books covered with a cloth.
The reflection of the candles in the water and on the ceiling creates a soft, moving light that no electric light source replicates.
Use unscented candles so the food’s fragrance is not disrupted.
Points for refining the setup:
- Distilled water stays clearer than tap water for several hours
- Add a few drops of food coloring, deep blue or black, for a dramatic watercolor
- Flat glass pebbles on the bowl floor give candles a stable base and add visual depth
- Place the number cards at the surface level where candlelight catches them most directly
11. Crystal-Inspired Hanging Strings
Cut clear plastic wrap into long strips. Attach small crystals, clear beads, or folded silver origami shapes at intervals along each strip using clear tape or thread.
Hang multiple strips from a curtain rod, a wooden dowel, or the top of a doorframe. When light hits the clear surfaces, the refractions move across the walls. It reads as far more expensive than it is.
This works best in a room with a single directional light source aimed at the hanging strings from the side.
Technical notes:
- Space the beads or crystals at irregular intervals; regularity makes it look manufactured
- Clear plastic wrap disappears visually, leaving only the light-catching elements visible
- Three to five strips grouped in a narrow cluster look more intentional than a wide spread
- Diffuse string lights behind the hanging strips add depth without competing for attention
12. Black Curtain + Gold Light Drip Wall
Hang a black curtain or two black bedsheets sewn together across one wall. Then, drape gold fairy lights from the top in long, loose cascades, so they hang like gold light drips.
Pin them loosely rather than tightly so they fall in natural curves. The contrast of gold light against black fabric is about as close to dramatic as a home setup gets.
Photograph everything against this backdrop for at least an hour. Guests will do the same.
Notes on execution:
- Use warm gold fairy lights, not cool white; the warmth makes the contrast more vivid
- Safety-pin the lights to the fabric at the top and let the rest hang freely
- Leave some sections denser and some sections sparse for a natural variation in the drip pattern
- A single large gold balloon number at the center of the wall ties the setup together
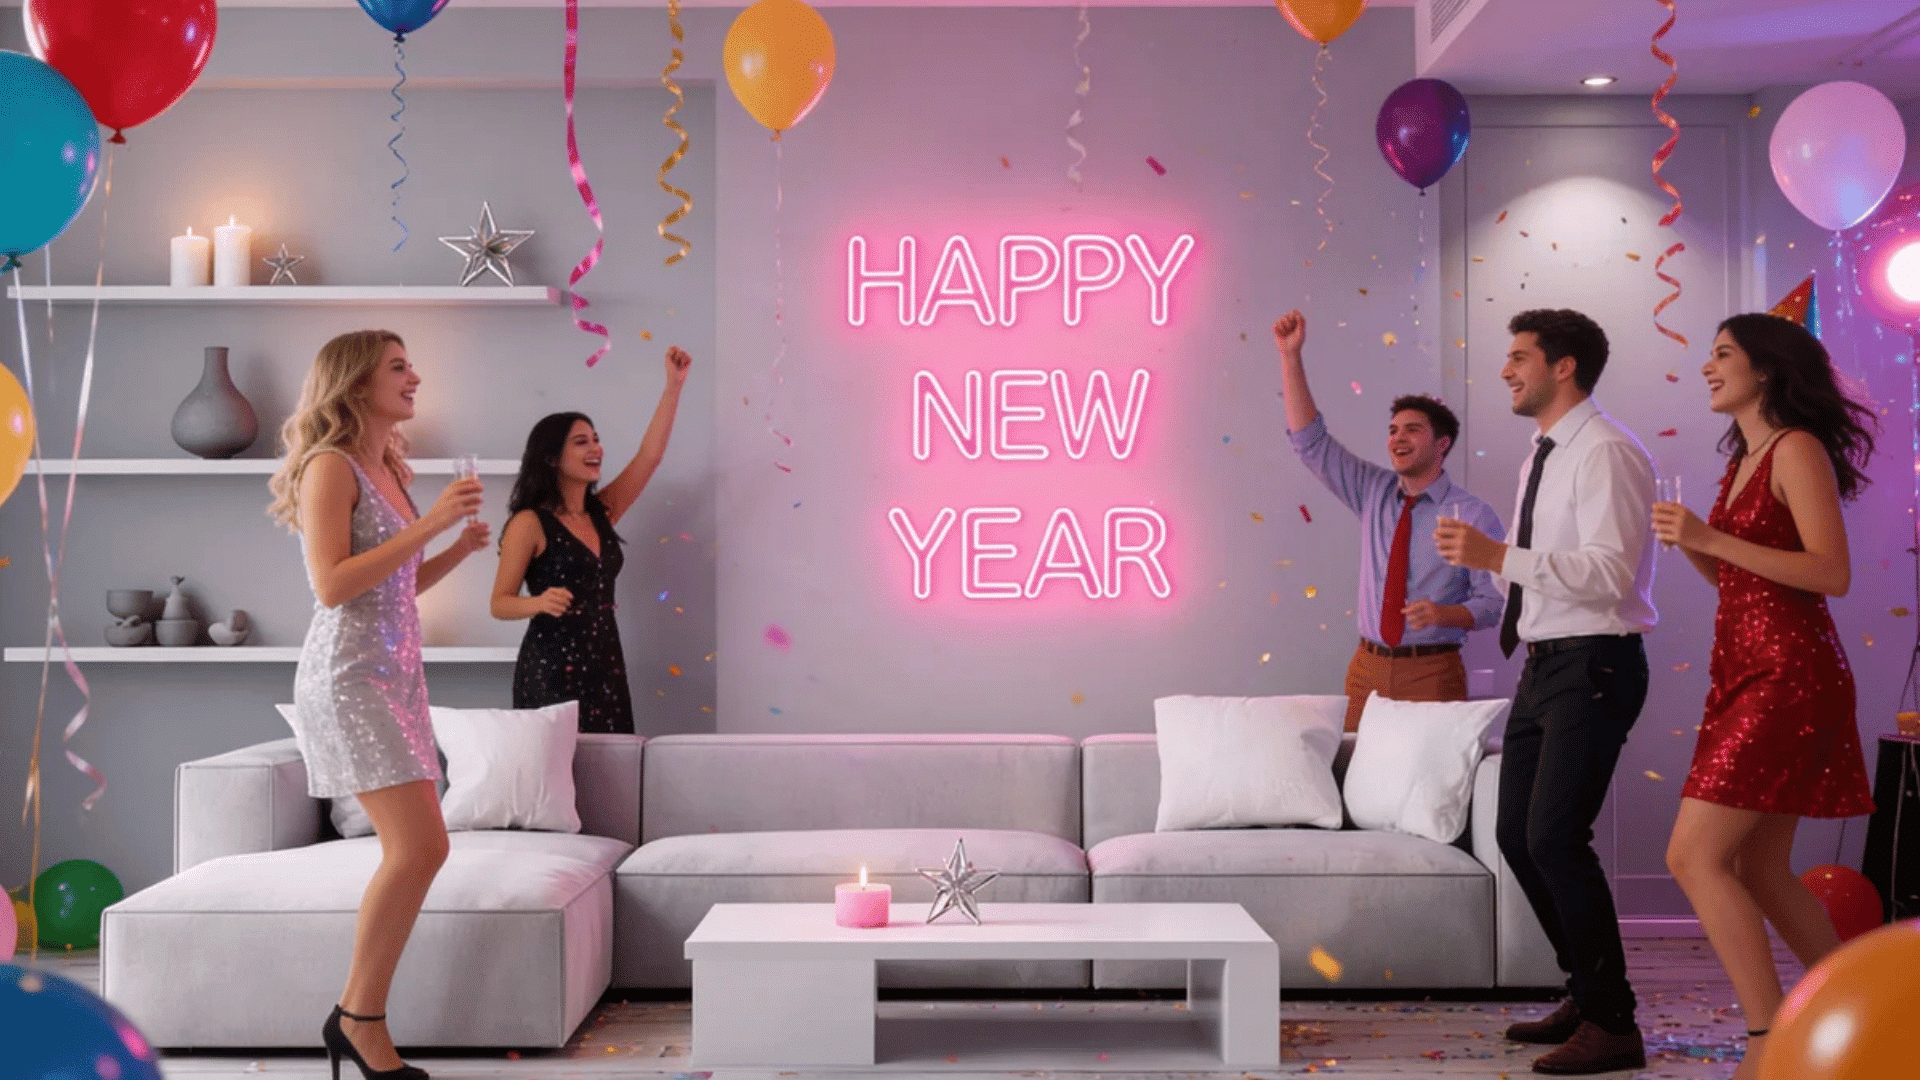
Simple Balloon Decoration Ideas for New Year’s Eve
Balloons do more than float. These three approaches treat them as structure, architecture, and art rather than just fillers.
13. Balloon Countdown Clock Design
Arrange balloons on a wall in the shape of a clock face. Use black balloons for the circle outline and gold or silver for the hour markers.
Cut clock hands from cardboard, paint them black, and tape them to the wall, pointing toward the current time. As midnight gets closer, move the hands. It reads as a giant, interactive decoration that the room keeps checking.
The scale is what makes it work. A clock face large enough to span most of a wall turns something ordinary into something worth staring at.
Balloon specifics:
- 12-inch balloons work best for the clock markers at this scale
- Tape a thin dowel or skewer to the back of each cardboard hand before mounting for rigidity
- A single metallic gold balloon at the center covers the tape joint and looks like a clock mechanism
- Use a chalk pen on black balloons to write numerals directly on them if needed
14. Confetti-Filled Clear Balloon Tunnel
Line a hallway or entryway with large, clear balloons stuffed with metallic confetti. When guests walk through, the confetti catches the light from all sides.
On a table at the end of the tunnel, leave toothpicks or small pins when guests exit, and then they pop one balloon each.
By midnight, the floor is covered in confetti and the tunnel is deflated. It works as both an entrance feature and a built-in midnight moment.
Setup notes:
- Using a funnel to push confetti into the balloon before inflating it is faster and less messy
- Tie balloons at alternating heights along the tunnel walls for a layered look
- Gold and silver confetti together read as more intentional than a single color
- Keep a broom nearby, confetti on hard floors at midnight is a slipping hazard
15. Balloon “Fireworks” Wall Burst
On a flat wall, tape balloons in a starburst pattern radiating out from a center point, mixing different sizes. Use gold, silver, black, and white.
Surround the burst with long gold ribbon streamers, also taped from the center outward, so the whole arrangement looks like a frozen firework.
At midnight, the person standing nearest to it pops the center balloon first. It is a simple thing, but the burst moment turns the whole room toward it.
The ribbon streamers stay on the wall as a decoration even after the balloons are gone.
Balloon wall tips:
- Fix balloons with strong wall-safe tape, not regular tape. The weight of multiple balloons adds up
- Graduate balloon sizes from small at the edges to large at the center for a burst illusion
- Use a few foil balloons mixed with latex for different textures in the arrangement
- The ribbon streamers should be cut in different lengths, shortest at the center, and longest at the edges
DIY New Year’s Table Decoration Ideas
A well-set table says the evening was considered, not assembled. These three approaches work with what most kitchens already have.
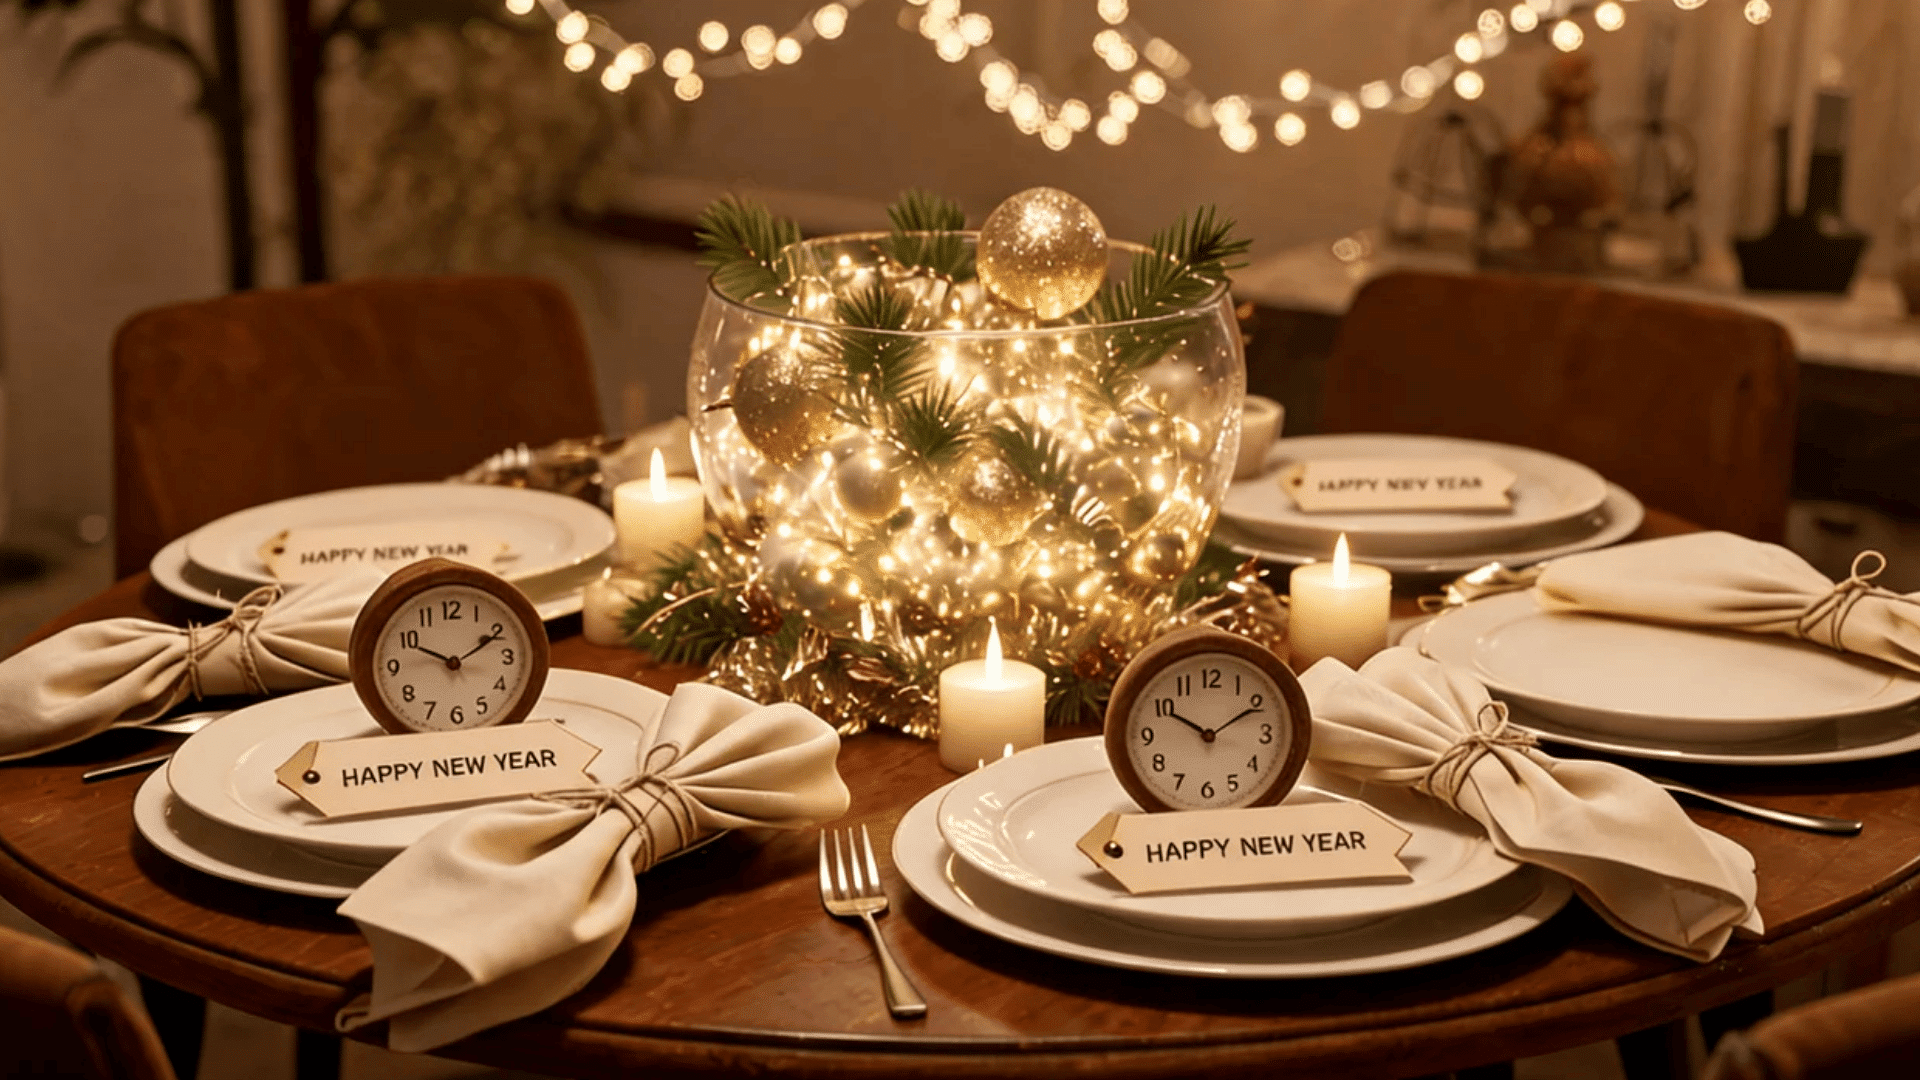
16. Mini Clock Place Settings
At each seat, place a small paper clock face cut from white card stock, drawn in black ink with a gold brad as the pivot point, set to midnight.
Tie it with a thin ribbon to the napkin or set it on the plate. It is the kind of thing guests notice without immediately understanding why it makes the table feel more complete.
My client asked for a New Year’s table setup for twelve, and I suggested this.
They sent a photo after the party: the clocks were still on the plates at 2 AM because nobody wanted to move them.
Table detail notes:
- Pre-set the hands to 11:58 PM so guests feel the anticipation from the moment they sit
- Use a hole punch and ribbon to attach the clock to a rolled napkin
- Write each guest’s name on the clock face as a combined place card and decoration
- Vary the clock sizes slightly; not all twelve need to be identical
17. Fortune Message Napkin Rolls
Roll each cloth or paper napkin tightly, tie with gold twine, and tuck a small folded paper inside the roll before tying.
On each paper, write a single line: a fortune, a question, a challenge, or a compliment,t one per guest.
Make each message specific to the person if you know the guests’ inside jokes, references to their year, or something personal.
When guests arrive and unroll their napkins, they read theirs aloud. The table immediately has an atmosphere that store-bought napkin rings cannot create.
For making these feel personal:
- Write messages by hand, printed text feels mass-produced at a table, this intimate
- Gold or red twine reads as festive without being garish
- Keep each message to one sentence. Longer messages get read silently, and the shared moment is lost
- Add a small dried flower or a single cinnamon stick inside the roll for scent
18. Sparkler-Inspired Centerpieces
Gather wooden skewers, metallic pipe cleaners, and silver and gold star stickers. Wrap pipe cleaners tightly around the top third of each skewer in a spiral.
Stick metallic stars along the wrapped section. Bundle seven to ten skewers together with a rubber band, then stand them in a small vase or a cup filled with stones.
They read as sparklers, frozen mid-light. Grouped down the center of a long table, they create a consistent festive line without blocking conversation the way tall floral arrangements do.
Centerpiece construction notes:
- Silver and gold pipe cleaners twisted together on the same skewer create more visual complexity
- Use a small terracotta pot painted black as the base; it is heavier and more stable than a cup
- Space the bundles about eighteen inches apart down the center of the table
- Add a few real dried branches among the skewer bundles for a mixed texture
Last-Minute New Year’s Decorating Ideas

An hour is more than enough time. These three setups require no shopping, no drying time, and no tools beyond what is already in the house.
19. Phone Flashlight Jar Glow Setup
Collect every glass jar, bottle, and drinking glass in the kitchen. Wrap some loosely in tissue paper; leave others clear. Set a phone face down inside each one with the flashlight on.
The light glows upward through the glass and through the tissue paper wrap in warm columns. Line them along a windowsill, down the middle of a table, or along a staircase banister.
The effect takes under ten minutes to arrange and produces a look that reads as considered, not accidental.
The tissue paper can be twisted, crumpled, or kept flat; each creates a different light quality.
Quick tips for this setup:
- Mix jar sizes; the variation in glow height creates depth
- Red, orange, or gold tissue paper shifts the flashlight color dramatically
- A small mirror or piece of tin foil inside the jar before the phone multiplies the glow upward
- Keep phone batteries above 50% before starting, as flashlights drain fast.
20. Quick Mirror Confetti Effect
Hold a large mirror flat and scatter metallic confetti across the surface. Set it on a low table or the floor with a lamp or candle nearby at an angle.
The mirror reflects both the confetti and the light source, doubling the visual impact in a room. Pick it up and prop it against a wall, and it becomes a backdrop.
It takes four minutes to set up. My friend did this at a last-minute gathering, and three separate people asked where they bought the “installation.”
Details worth knowing:
- Circular mirrors work better than rectangular ones; the shape reads as more intentional
- A mix of star-shaped and circular confetti on the mirror surface adds variety
- Position the lamp at a 45-degree angle to the mirror for the best light bounce
- A piece of velvet fabric under the mirror stops it from sliding and adds a base layer of texture
21. LED Strip Around Door Frames
Peel-and-stick LED strips around a doorframe take about twelve minutes to apply.
Gold warm-white strips around the main entryway or between two rooms create an arch of light that every guest walks through.
It looks like a venue feature rather than a last-minute fix. These strips are reusable and come off cleanly in the morning.
Stack a second color, deep orange or red, above or below the first strip for a gradient effect along the frame.
Installation notes:
- Wipe door frames with a dry cloth before applying the adhesive to prevent the adhesive from gripping
- Run the LED controller wire down the hinge side of the frame so it is less visible
- Warm white outperforms cool white for this application by a significant margin
- Overlap the corner joints slightly rather than cutting precisely, which avoids gaps at the angles
Modern New Year’s Home Decor Trends
The direction in home party styling has moved away from excess. These three approaches are specific, quiet, and more interesting up close than from across the room.
22. Neon Quote Wall (DIY LED Words)
Bend flexible LED neon rope into words or a single number against a dark wall. “2026,” “this year,” or a single word you want to carry into the new year all work.
Fix the shape with small cable clips on a black foam board. The board hangs flat, the neon sits in front of it, and the result looks almost identical to a commercial neon sign.
The foam board background also means the light does not bleed onto the wall behind it.
Warm pink, gold, or blue neon rope tends to photograph better than pure white.
Technical notes:
- Flexible neon LED rope is sold in rolls and cuts at marked intervals. Plan letter shapes on paper first
- Small U-shaped cable staples available at hardware stores hold the rope in curved shapes
- Leave a slight imperfection in the lettering,too-perfect curves look machine-made
- The finished board can be framed in thin black wood trim for a polished edge
23. Monochrome Theme With One Bold Accent
Choose one color for the entire party space: black, white, deep green, or navy, and execute it fully: tablecloth, balloons, napkins, candles, ribbon, all matching.
Then introduce a single accent color in one specific object only: a single gold vase, a single red balloon, or a single yellow candle at the center of the table.
The contrast between the monochrome base and the single accent draws the eye more than a fully varied palette does.
Restraint in color is not a design compromise; it is a design decision.
Application points:
- Choosing the accent color before setting up the monochrome base makes placement decisions easier
- The accent object should be large enough to register at room scale; a small item gets lost
- Match all secondary materials to the base color exactly, including tape and string
- Avoid metallic finishes in the base palette; save metallic for the accent only
24. Floating Shelf Party Styling
Three floating shelves mounted on one wall, staggered at different heights, styled with a mix of objects at different scales.
A large number of candles, a small plant, a few framed polaroids, a glass with fairy lights inside, and a handwritten note in a clip frame.
The shelf arrangement works as a slow-burning conversation piece. Guests walk up to it individually, look at each object, and the party has a focal point that is not a screen.
It holds energy in one part of the room and keeps the rest of the space open.
Styling notes:
- Odd numbers of objects per shelf (three or five) read as more natural than even numbers
- Leave deliberate space on at least one shelf; breathing room matters visually
- Scale up as you go down, lighter objects on higher shelves, heavier on lower ones
- A trailing plant or ribbon that falls off the shelf edge breaks the grid and softens the arrangement
Fun and Cute New Year Decorations
Not everything at a New Year’s party needs to be serious about the year ending. These three are made to be played with.
25. Kids Countdown Balloon Pop Game
Number twelve balloons 1 through 12, one for each hour of the day, and hang them in order on a wall or string line. Starting at noon, one balloon gets popped each hour.
Each balloon contains a small slip of paper with a party activity for the next hour: “make a dance video,” “eat a snack shaped like a star,” “draw what you want next year to look like.”
By midnight, all twelve are gone, and the kids have been busy all day. This game runs itself once the balloons are made.
Notes on running this well:
- Seal the activity slips with a small dab of glue before inserting, so they stay rolled inside the balloon
- Number the balloons clearly with a black marker to prevent confusion during the countdown
- Pre-read all twelve slips before the party to make sure activities suit the ages attending
- Keep a bowl of spare activities nearby in case a slip is unreadable after popping
26. DIY Memory Capsule Box Display
Decorate a shoebox with black-and-gold paper, cut an opening in the lid, and place it on a table with small slips of paper and a pen.
Guests write one memory from the year they want to save and put it through the slot. At midnight, someone reads them all aloud.
The box itself becomes a decoration once it is full; you can see slips through the slot, the handwriting visible through the gap.
Store it sealed for a year, then open it next December.
Design tips for the box:
- Cover the shoebox in black wrapping paper first, then layer gold washi tape in diagonal strips
- Write the year on the lid in large gold lettering with a paint pen
- Cut the slot just large enough for a folded slip; too large and the contents fall out
- Line the inside with gold tissue paper so slips look contained and intentional
27. Cartoon Clock Face Wall
Draw an oversized clock face approximately three feet across on brown craft paper using black marker and bright colors for the numbers.
Make the hands from two strips of thick cardstock. Tape it to the wall at eye level. Keep the style intentionally graphic: bold outlines, oversized numerals, exaggerated proportions.
Move the hands every thirty minutes through the evening. Both children and adults interact with it.
The handmade quality is the point; no store version looks this specific to the room it is in.
Drawing notes:
- Use a piece of string and a marker as a DIY compass to draw the circle at this scale
- Block Roman numerals read better at a large scale than Arabic numerals
- Bright colors for the numbers make it readable in dim party lighting
- A border of stars or confetti shapes drawn around the outer edge adds visual interest
Outdoor New Year’s Decoration Ideas
Outdoor setups reward boldness. Scale up, work with the darkness rather than against it, and use materials that hold up to wind and chill.
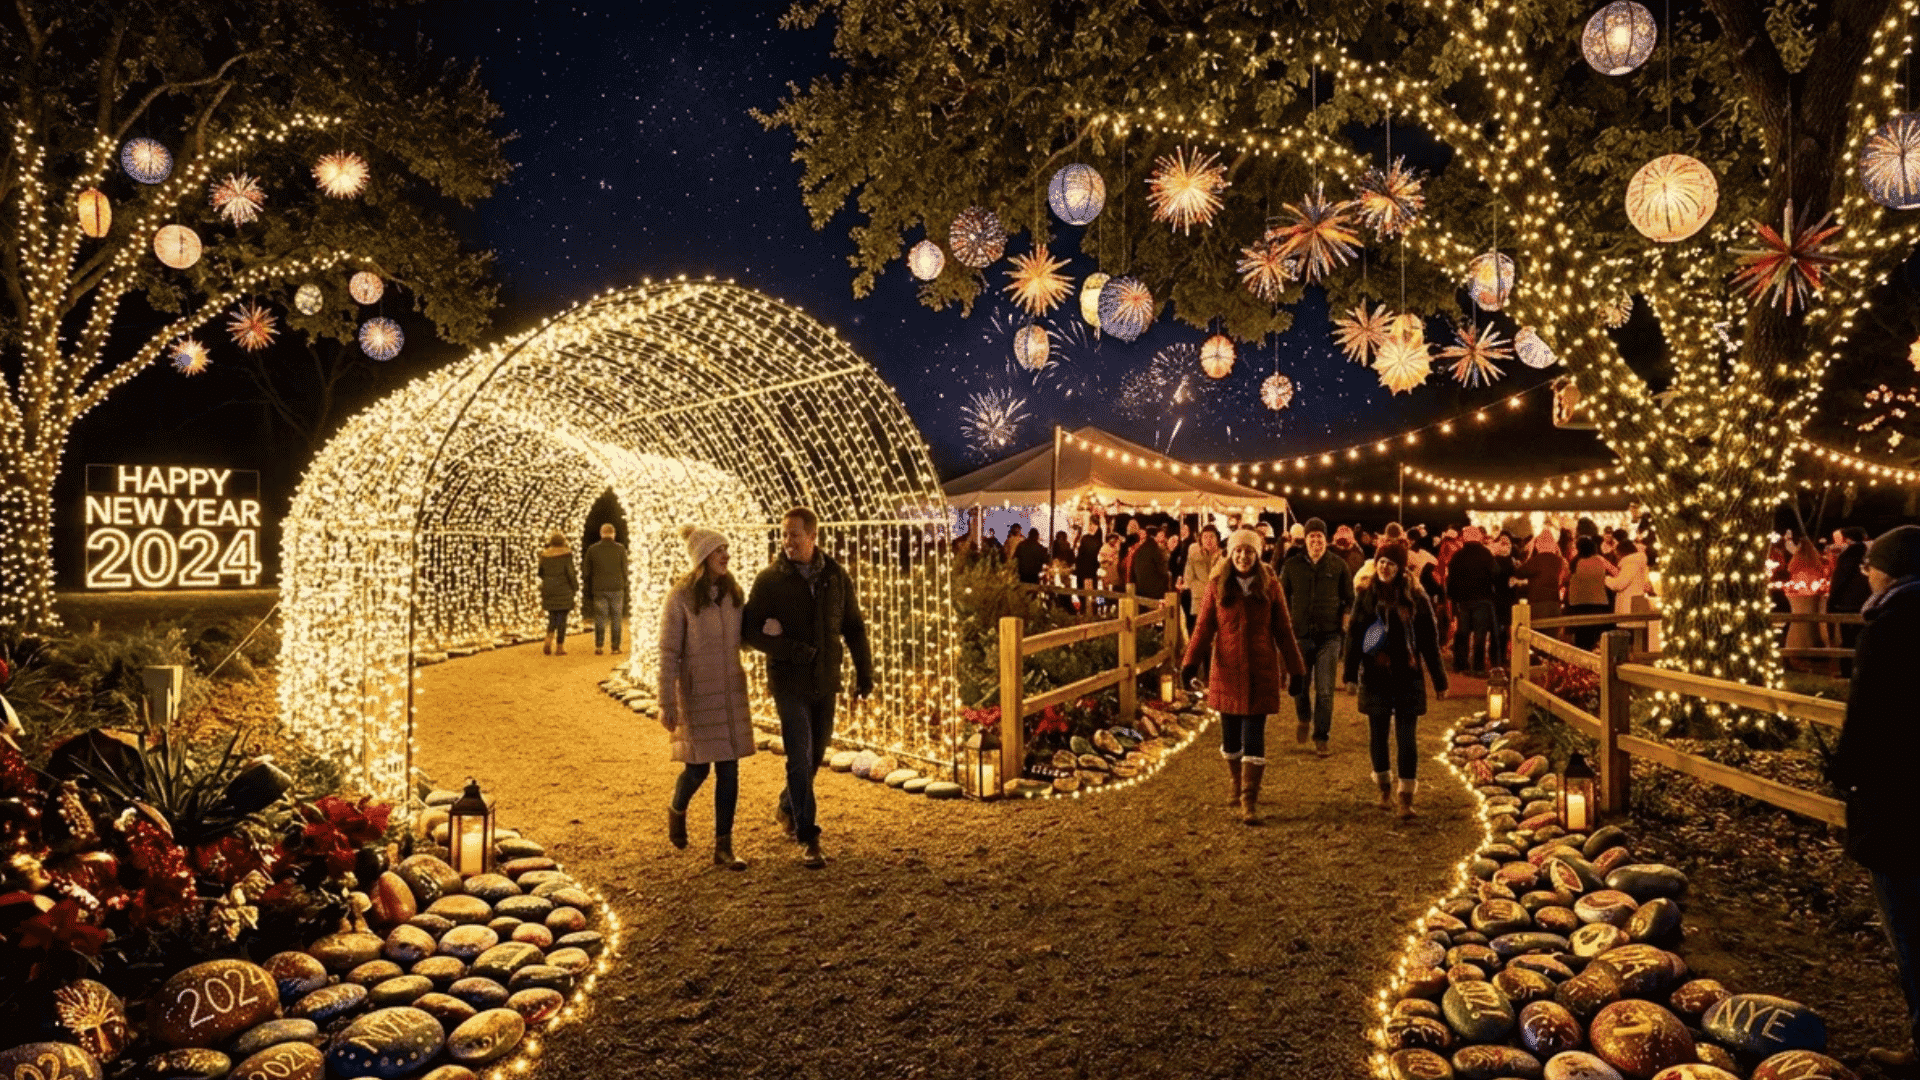
28. Light Tunnel Entrance Walkway
Build a tunnel entrance along the path to your door using wire arches formed from garden wire or hula hoops spaced three feet apart and covered with fairy lights.
Eight to ten arches create a walkway about twenty to twenty-five feet long that guests pass through before reaching the door.
Each arch should be planted with tent stakes or heavy stones firmly at the base. Warm-white lights along the top and sides of each arch give the tunnel a soft glow.
It is the kind of thing that stops people before they even ring the doorbell.
Set up details:
- Hula hoops work as instant arch frames. Stake them at both ends to prevent tipping
- Thread lights through the hoop rather than draping them loosely, so they hold shape in the wind
- Add greenery or ribbon along the base of each arch to connect them visually
- Line the ground between arches with luminaries, paper bags weighted with sand, and lit with tea lights
29. Glow Path With Painted Stones
Collect flat stones from a garden or purchase them in bulk from a garden center.
Paint them with phosphorescent paint, the same kind used for glow-in-the-dark crafts indoors, and lay them along a garden path, a driveway edge, or the perimeter of a patio.
During the day, sunlight charges them. After dark, they glow. The effect is subtle but genuinely surprising for guests who have not seen it before.
Combine round stones with star-shaped clay ones for a mixed path that looks intentional.
Outdoor stone notes:
- Two coats of phosphorescent paint give a stronger glow than one
- A final coat of clear weatherproof varnish protects the paint from damp ground
- Arrange stones in clusters rather than evenly spaced lines for a more natural look
- Charge stones under a strong lamp indoors before the party if cloud cover prevents sun charging
30. Hanging Paper Fireworks Trees
Cut long strips of metallic crepe paper in gold, silver, and red. Fold each strip accordion-style and staple the center.
Fan the strips out and attach ten to twelve strips per tree by tying them to bare branches with clear thread. The metallic strips hang like burst fireworks from the branches and catch the wind movement outdoors.
A group of three trees placed near the entrance with uplighting beneath them reads as a considered installation. These hold up to light wind and can be made in an afternoon.
Outdoor installation points:
- Longer strips (12–18 inches) create more dramatic movement in the wind
- Secure each strip tightly at the tie point; loose ties slip and shift the arrangement
- Use string lights in the branches below the paper strips so the metallic pieces catch the light
- Remove the paper strips before the rain, in wet crepe paper, tears, and stains
Unique Handmade New Year Decor Ideas

The most interesting handmade decor tends to have a concept behind it, not just a shape. Each of these five carries a specific idea that comes through in the finished piece.
31. DIY “Time Flies” Hanging Clocks
Collect five to eight old clock faces from thrift stores, broken wall clocks, or printed templates, and drill small holes at the top of each.
Thread the fishing line through and hang them at different heights from a ceiling hook or a wooden dowel. Attach small white paper wings to two or three of the clocks.
The installation reads as a visual pun: time flies, literally. It is also a genuinely good-looking piece.
I made a version of this for my own place, and it stayed up well past January because I kept forgetting I had meant to take it down.
Construction tips:
- Wing shapes cut from white cardstock work. Fold a slight curve into them before attaching
- Mix analog clock faces from different eras for a more collected, less manufactured look
- Vary the heights so clocks overlap slightly when viewed from the side
- A single pendulum-style clock at the center, with smaller ones around it, creates a natural focal point
32. Personalized Year Number Collage
On a large canvas or piece of mounting board, draw the new year’s number in pencil at a very large scale, filling the entire surface.
Then fill each numeral with collaged materials: torn magazine pages, old birthday cards, fabric swatches, printed photos, washi tape, and paint swatches.
Every material goes inside the number outlines. Outside, the numbers stay white.
The finished piece reads as two things at once: the year, and everything that made the year. When framed, it looks like something that belongs in a gallery.
Collage tips:
- Mod Podge seals each layer and dries clear. Apply between layers for a flat finish
- Use materials with personal significance rather than random magazine scraps. The story in the materials is visible
- Let the texture build up in some areas and stay flat in others for visual variety
- A final coat of matte varnish protects the surface and removes the patchy wet look of Mod Podge
33. Handmade Confetti Poppers Station
Set up a table with cardboard tubes (toilet paper or paper towel rolls), tissue paper squares, ribbon, and a bowl of homemade confetti cut from metallic paper.
Guests assemble their own popper: stuff tissue paper into one end, fill the tube with confetti, close the other end with tissue paper and tape, wrap the tube in ribbon.
At midnight, everyone holds their popper and twists both ends outward. The confetti bursts out.
Making them is part of the party activity, and using them is the midnight moment.
Station setup notes:
- Pre-cut the tissue paper and confetti before guests arrive, so the assembly is fast
- Provide several ribbon colors so each popper looks different
- A step-by-step instruction card at the table means guests can make them without asking for help
- Set out a few pre-made example poppers so the finished result is clear
34. DIY Champagne Splash Wall Art
On a large sheet of black poster board or canvas, pour and flick gold, silver, and white paint to simulate the look of champagne splashing outward from a central burst point.
Work fast with thin paint and a flat brush. Add a small champagne flute silhouette at the base in white paint once the splashes are dry.
Frame it or hang it directly. The finished piece works as party decor during the event and as actual wall art after.
My friend made four of these in one afternoon, kept one, and gave the others as gifts.
Painting notes:
- Thin paint with a small amount of water before flicking for more natural, varied splatter
- Hold the brush two feet from the surface for wide splashes, six inches for fine detail
- Gold metallic craft paint over dried silver splashes creates a layered, dimensional look
- A small, real champagne cork glued to the canvas near the flute silhouette adds a three-dimensional accent
35. Shadow Box With New Year Goals
A deep shadow box frame available at craft stores or online becomes a three-dimensional vision board for the new year.
Write goals on small folded cards. Print tiny photos representing things you want. Add small symbolic objects: a coin for financial goals, a tiny book for reading, a small sprig of a plant for health.
Arrange and glue these elements in layers within the box. Hang it where you see it daily.
My client made one of these and said the act of building it was more clarifying than any goal-setting exercise they had tried before.
Shadow box tips:
- Work from back to front, place flat paper elements first, then three-dimensional objects in front
- Use a consistent color palette within the box so it reads as cohesive rather than cluttered
- Limit to seven or eight items maximum; a crowded shadow box loses clarity
- Seal the back with kraft paper and write the date before hanging, so future-you knows when it was made
Must-Have Supplies for DIY New Year Decorations
Having the right materials ready makes decorating faster and more enjoyable. It also helps you stay consistent with your theme and avoid last-minute stress.
- Basic Craft Supplies: Balloons, colored paper, glue, scissors, and string lights form the foundation of most DIY decorations.
- Budget-Friendly Store Options: Stores like Dollar Tree, Walmart, and Target offer affordable decor items, party supplies, and craft materials that help you stay within budget without sacrificing style.
- Online Shopping for Unique Pieces: Platforms like Amazon and Etsy provide a wide selection of decorative items, including handmade and custom pieces that can add a more personal touch to your setup.
- Lighting and Ambiance Tools: Fairy lights, LED strips, candles, and battery-operated lamps help set the mood for your celebration. Good lighting can make even simple decorations look more appealing and festive.
- Decor Add-Ons and Finishing Touches: Items like ribbons, glitter, stickers, and metallic tapes help enhance your DIY projects.
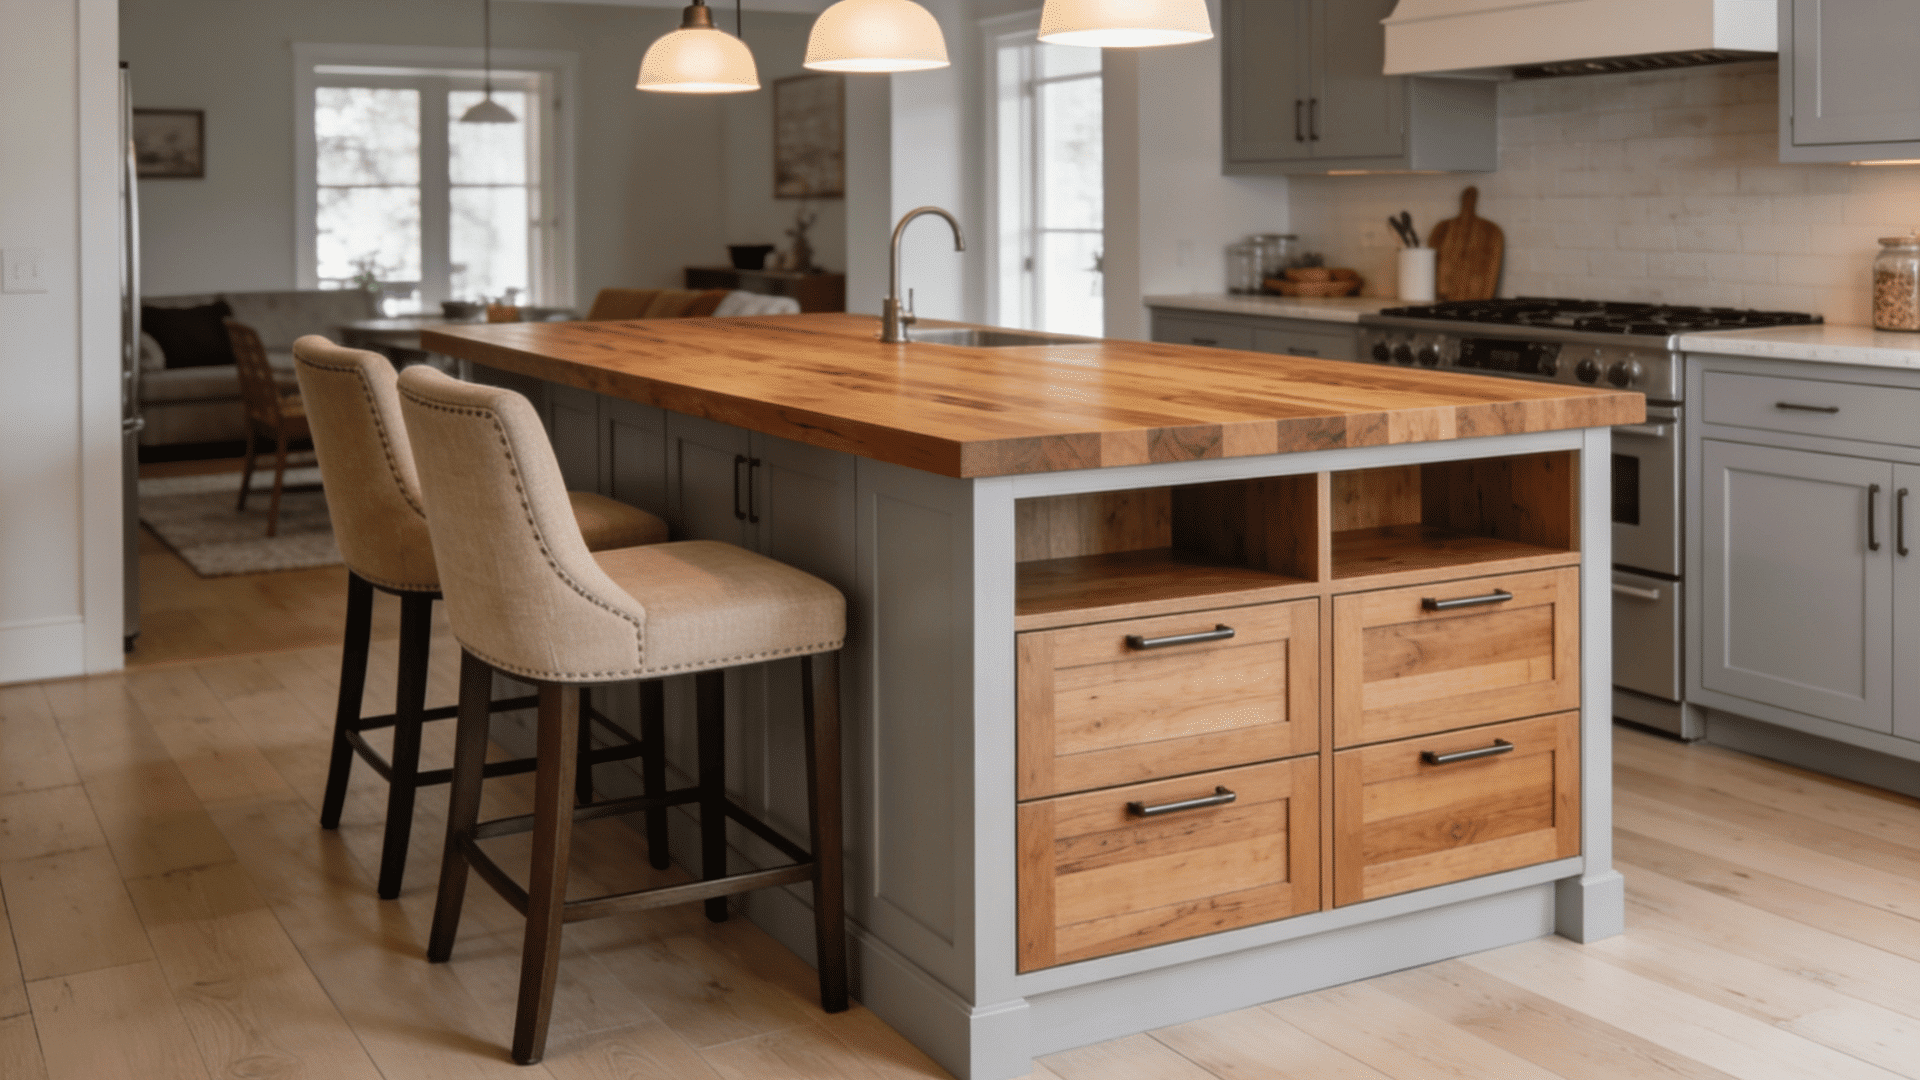
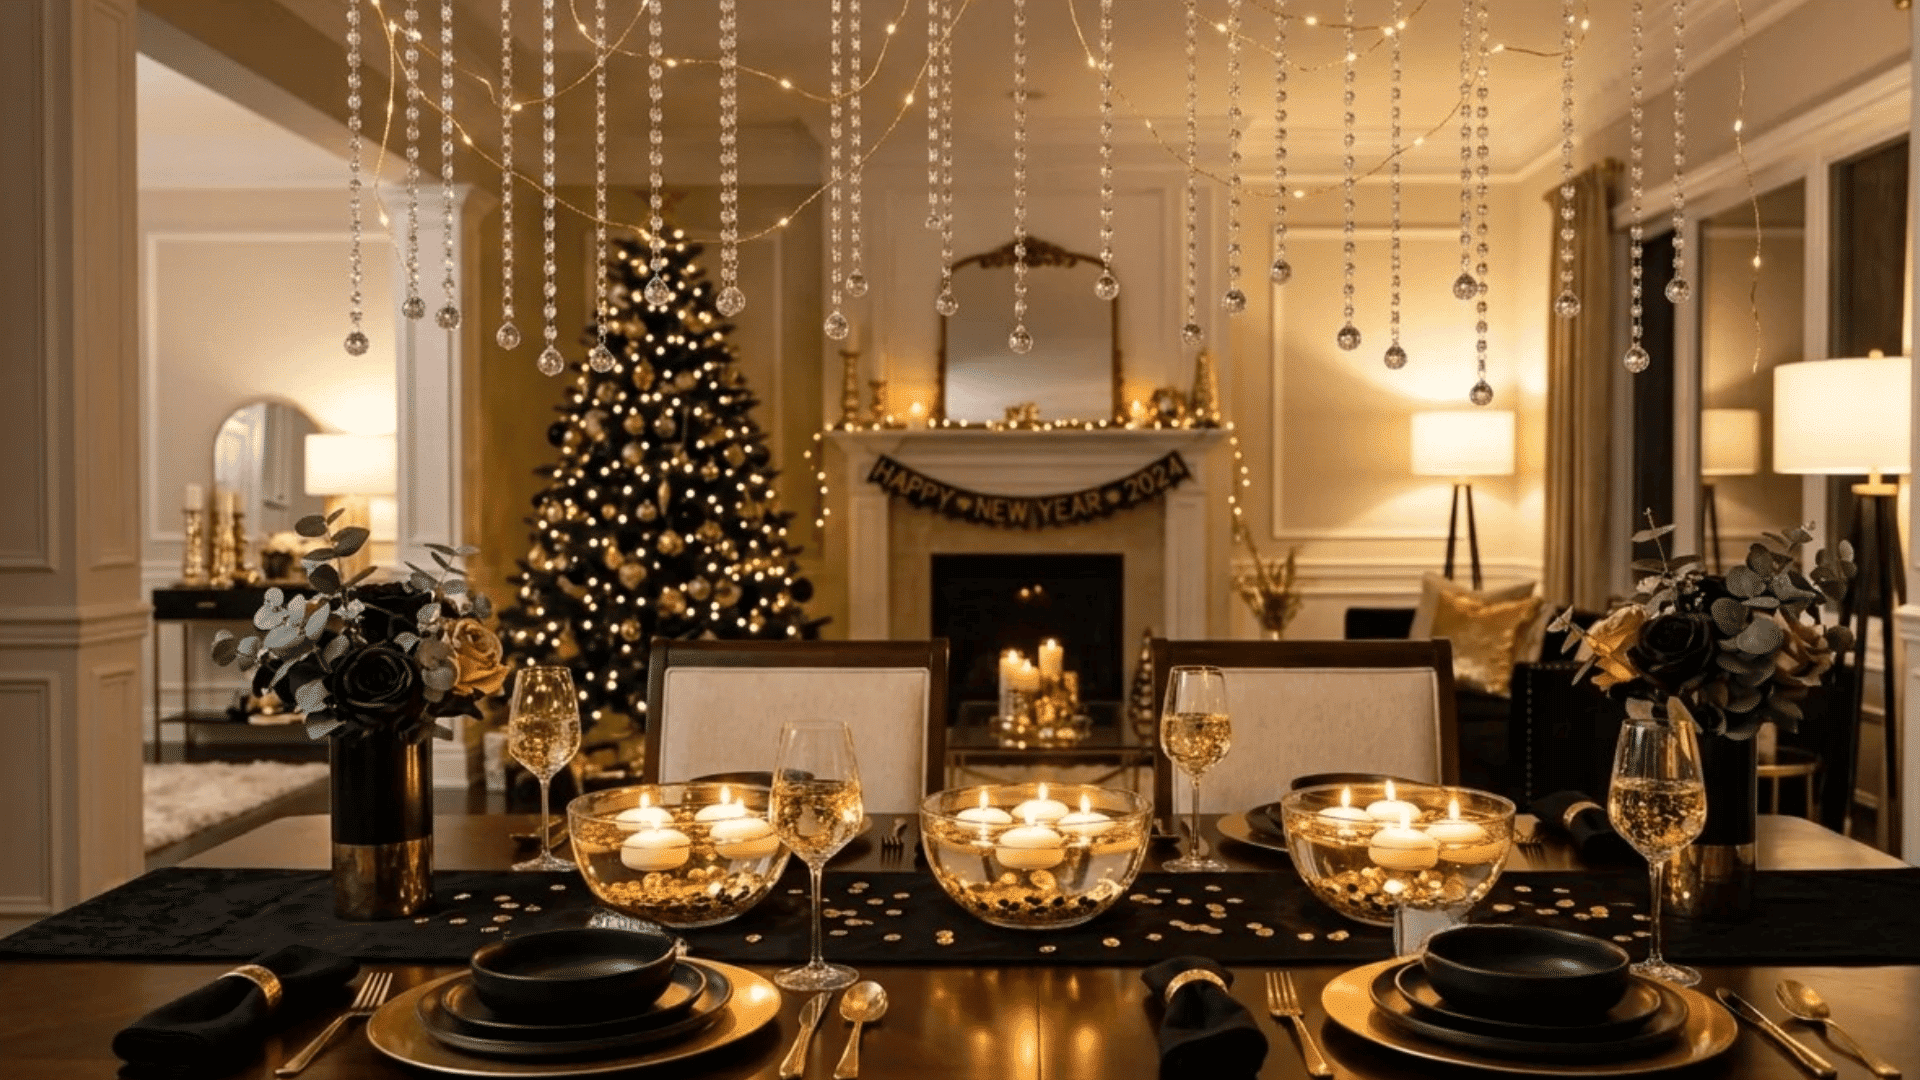
How to Decorate Your Living Room for New Year’s Eve
Start by focusing on the walls, ceiling, and table to shape the space. Add simple lighting and match decor with the theme for a clean party look.
Walls can hold banners, photo displays, or backdrop setups. The ceiling works well with balloons or hanging lights to fill the space.
Tables should stay neat with centerpieces or small decor items that don’t block movement. These three areas help create balance without overcrowding.
Lighting makes a big difference. Use fairy lights, LED strips, or candles to build a warm party vibe. This pairs well with seasonal decor, such as soft textures and cozy tones that feel right for the time of year.
Match colors and styles across all elements to keep everything connected.
Bottom Line
New Year’s Eve decorations don’t have to be perfect to feel special. What matters most is the thought behind each detail and how the space comes together for the moment.
Simple DIY ideas can turn any room into a warm, fun, and full-of-life space. From creative walls to small table touches, every piece adds to the overall feel of the celebration.
Trying new ideas can also make the process more enjoyable, especially when mixing styles or using items already at home.
It’s less about getting everything right and more about creating a space that feels good to be in.
If any of these ideas worked well or inspired something new, share your experience in the comments below.
Frequently Asked Questions
Can DIY New Year’s Decorations Look Stylish?
Yes, simple materials can create clean and modern decor.
Are Budget-Friendly Decorations Enough for a Party Setup?
Yes, low-cost items can still make the space look festive.
Is It Possible to Decorate a Room Quickly for New Year’s Eve?
Yes, basic lighting and small accents can completely change a space fast.