Ever fallen in love with a dining table at the store, only to look at the price tag and quickly walk away? You’re definitely not alone!
The good news is that you don’t need to spend a fortune to have a stylish and sturdy table in your home.
With a little creativity, some basic tools, and the right materials, you can build your own DIY kitchen table for a fraction of the cost.
If you prefer a modern farmhouse look, a rustic wood finish, or a simple space-saving design, there are plenty of homemade dining table ideas to match every style and budget.
This blog will share inspiring table ideas, beginner-friendly building tips, and helpful advice on choosing the best wood, tools, paints, and finishes.
Get ready to create a beautiful table that fits your space perfectly!
Why Build Your Own DIY Dining Table?
Building your own dining table gives you complete control over the size, style, color, and finish so it fits your home perfectly.
It’s also a cost-effective alternative to expensive store-bought furniture, letting you create something unique with your own hands.
From farmhouse and rustic designs to modern and space-saving styles, a DIY table can match any home decor.
Handmade furniture also adds a personal touch and becomes a meaningful part of everyday family moments and gatherings.
Material Required
Having all your materials and tools ready before you start will make building your table much easier and less stressful.
- Red Oak Boards (tabletop)
- Wood Screws & Pocket Hole Screws
- Wood Glue
- Paint or Stain + Primer
- Sandpaper (80–220 Grit)
- Table Saw / Circular Saw
- Orbital Sander
- Drill & Clamps
- Pocket Hole Jig
- Measuring Tape & Straight Edge
How to Make a DIY Dining Table
Below are the steps to make a beautiful dining table yourself:
Step 1. Remove the Old Tabletop
Carefully detach the existing tabletop from the table base using the proper tools. Remove screws, brackets, nails, or fasteners without damaging the frame.
Keep reusable hardware organized for later use. While removing the top, inspect the condition of the base and supporting structure.
This step clears the way for repairs, upgrades, and the installation of a brand-new tabletop that fits securely and evenly.
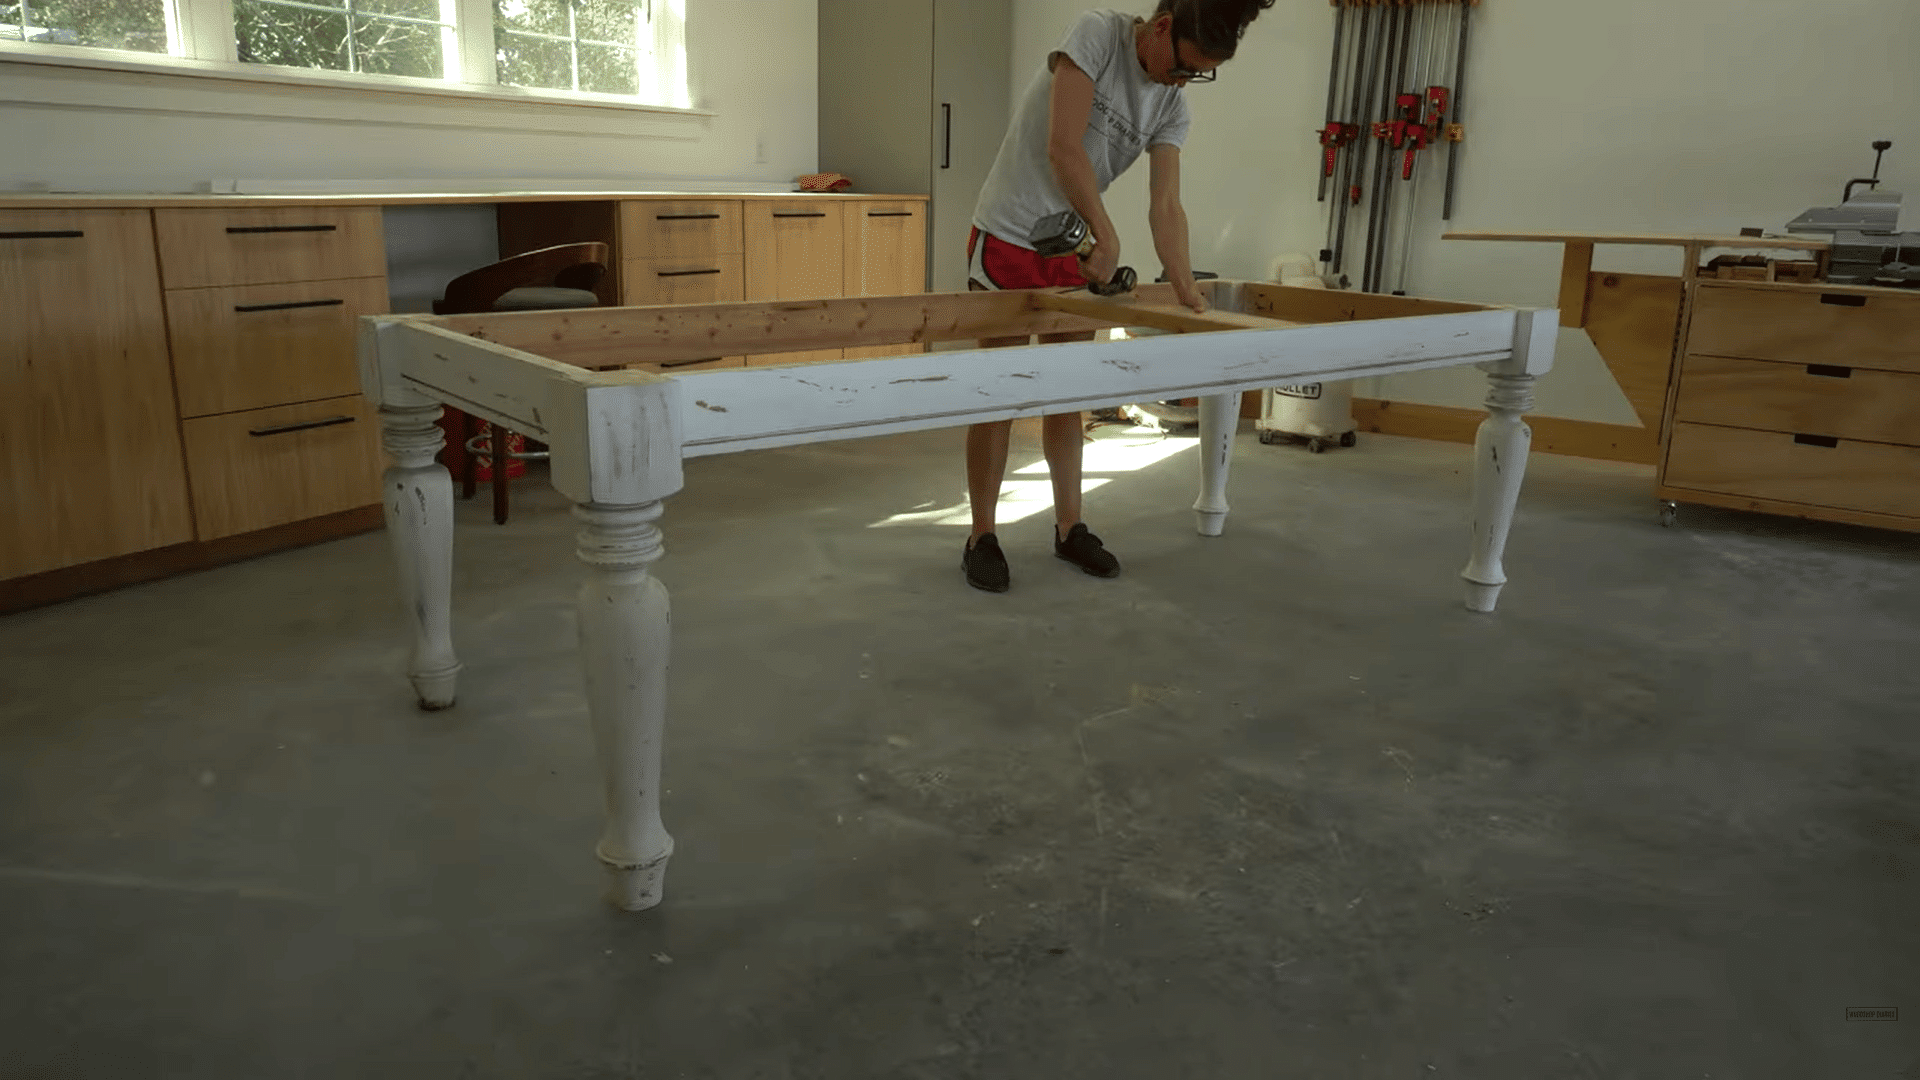
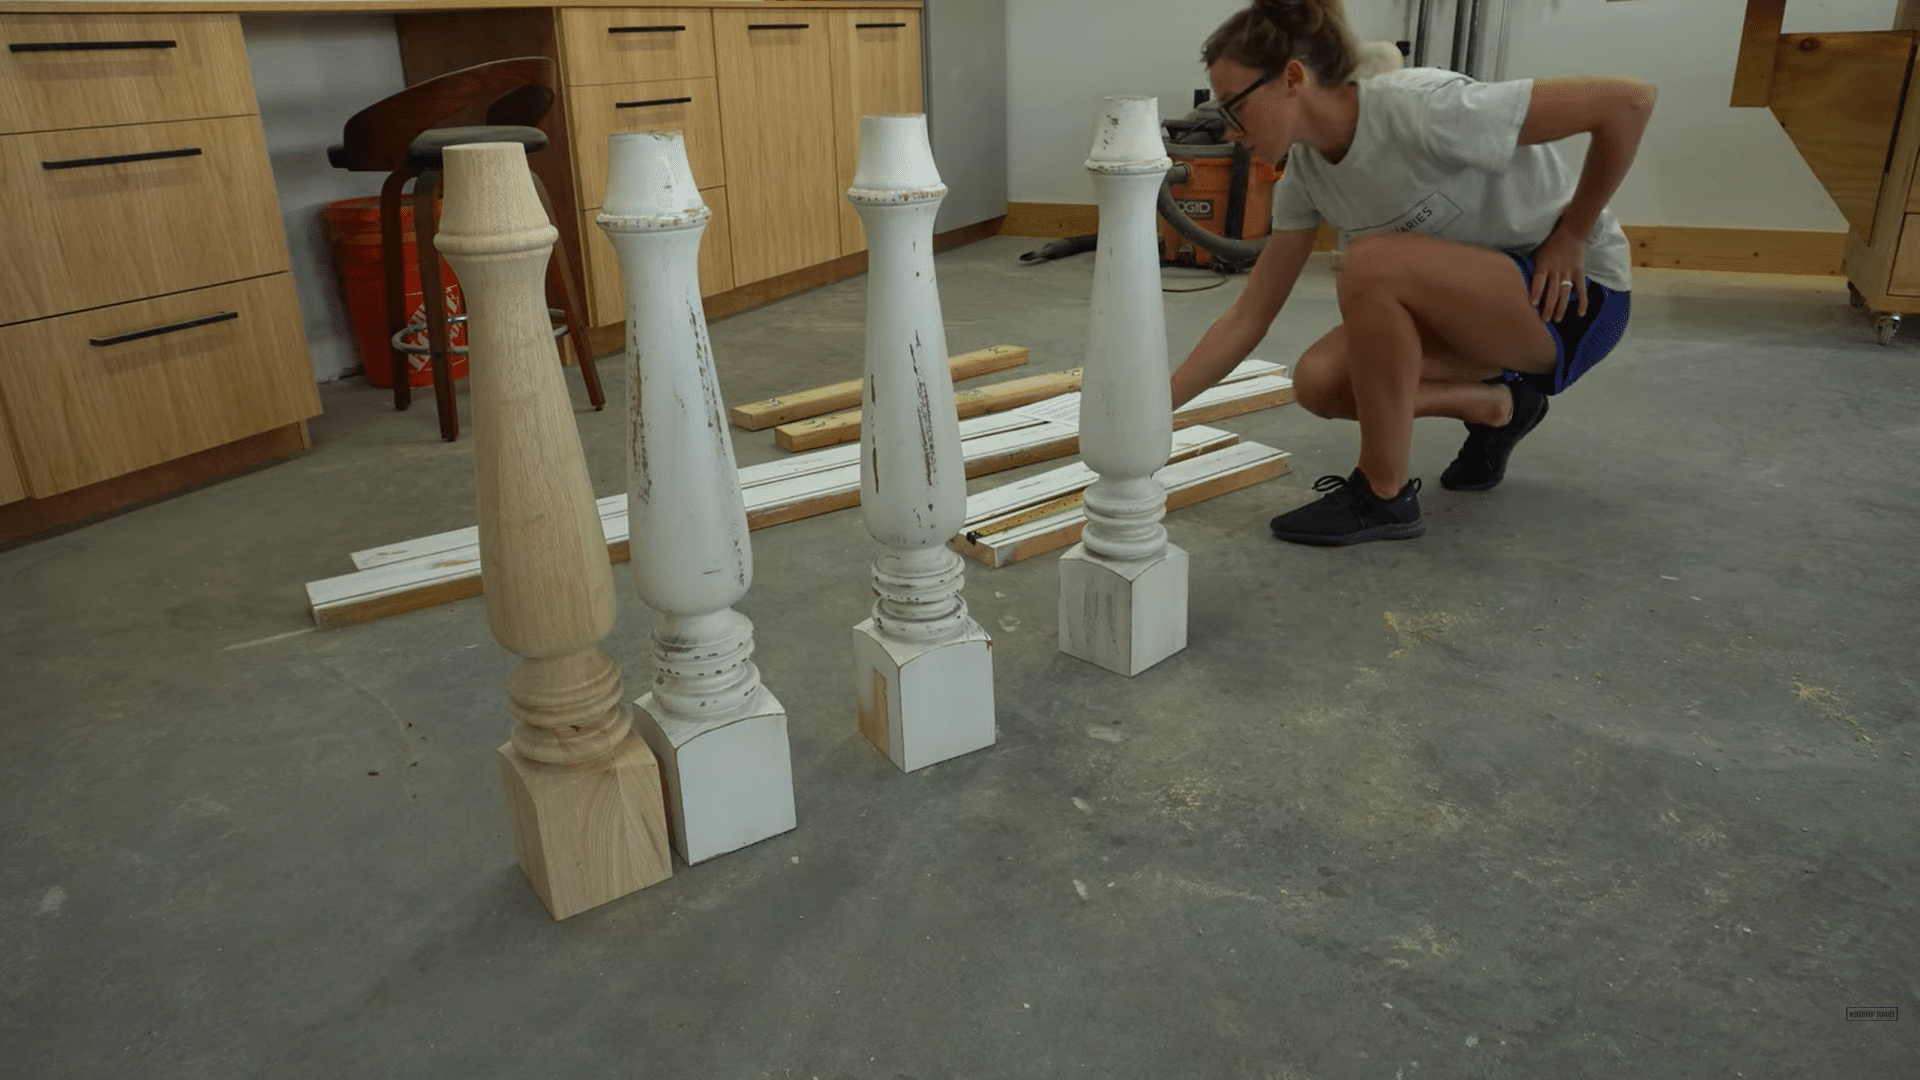
Step 2. Repair the Table Base
Examine the table base closely for cracks, loose joints, weak braces, or damaged legs. Replace worn or broken parts to restore strength and balance.
Tighten screws, apply wood glue where needed, and reinforce unstable sections with additional supports.
A sturdy base is important because it supports the weight of the new tabletop. Proper repairs at this stage help create a safe, stable, and long-lasting dining table.
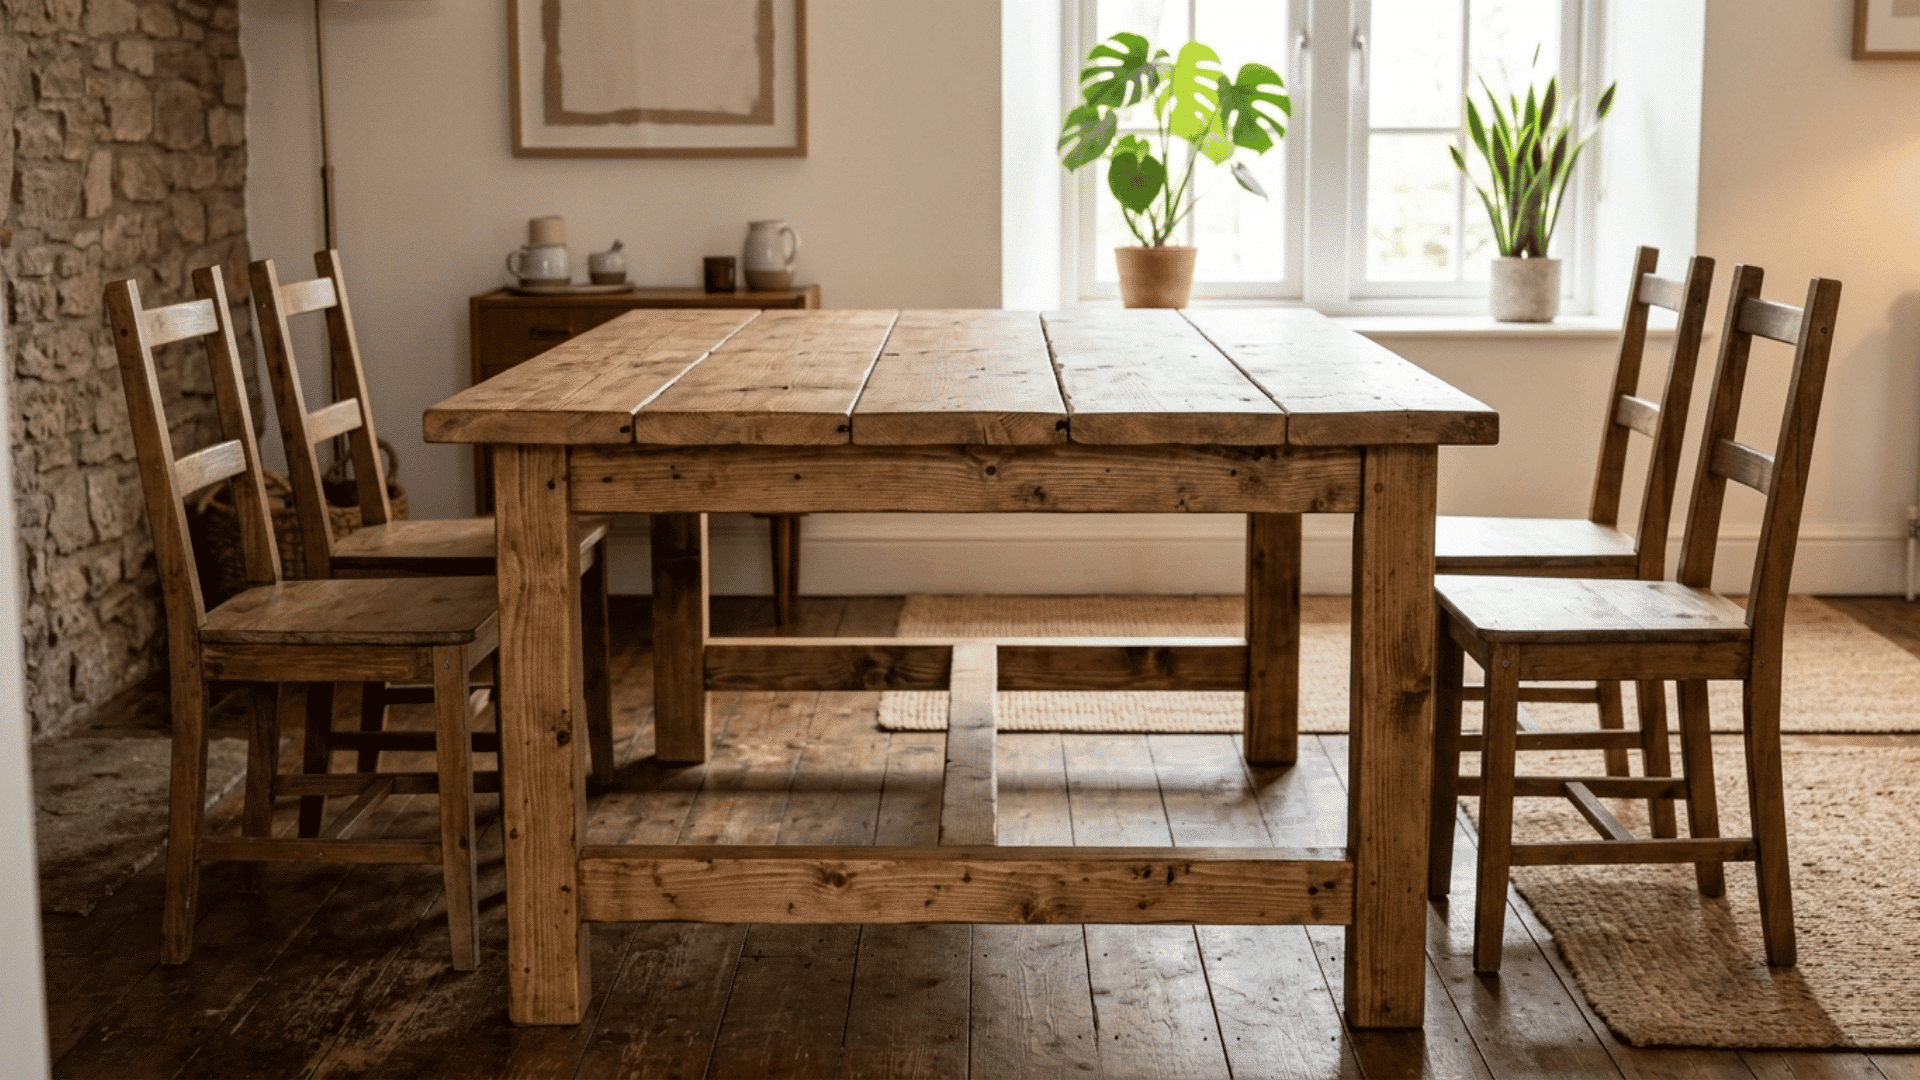
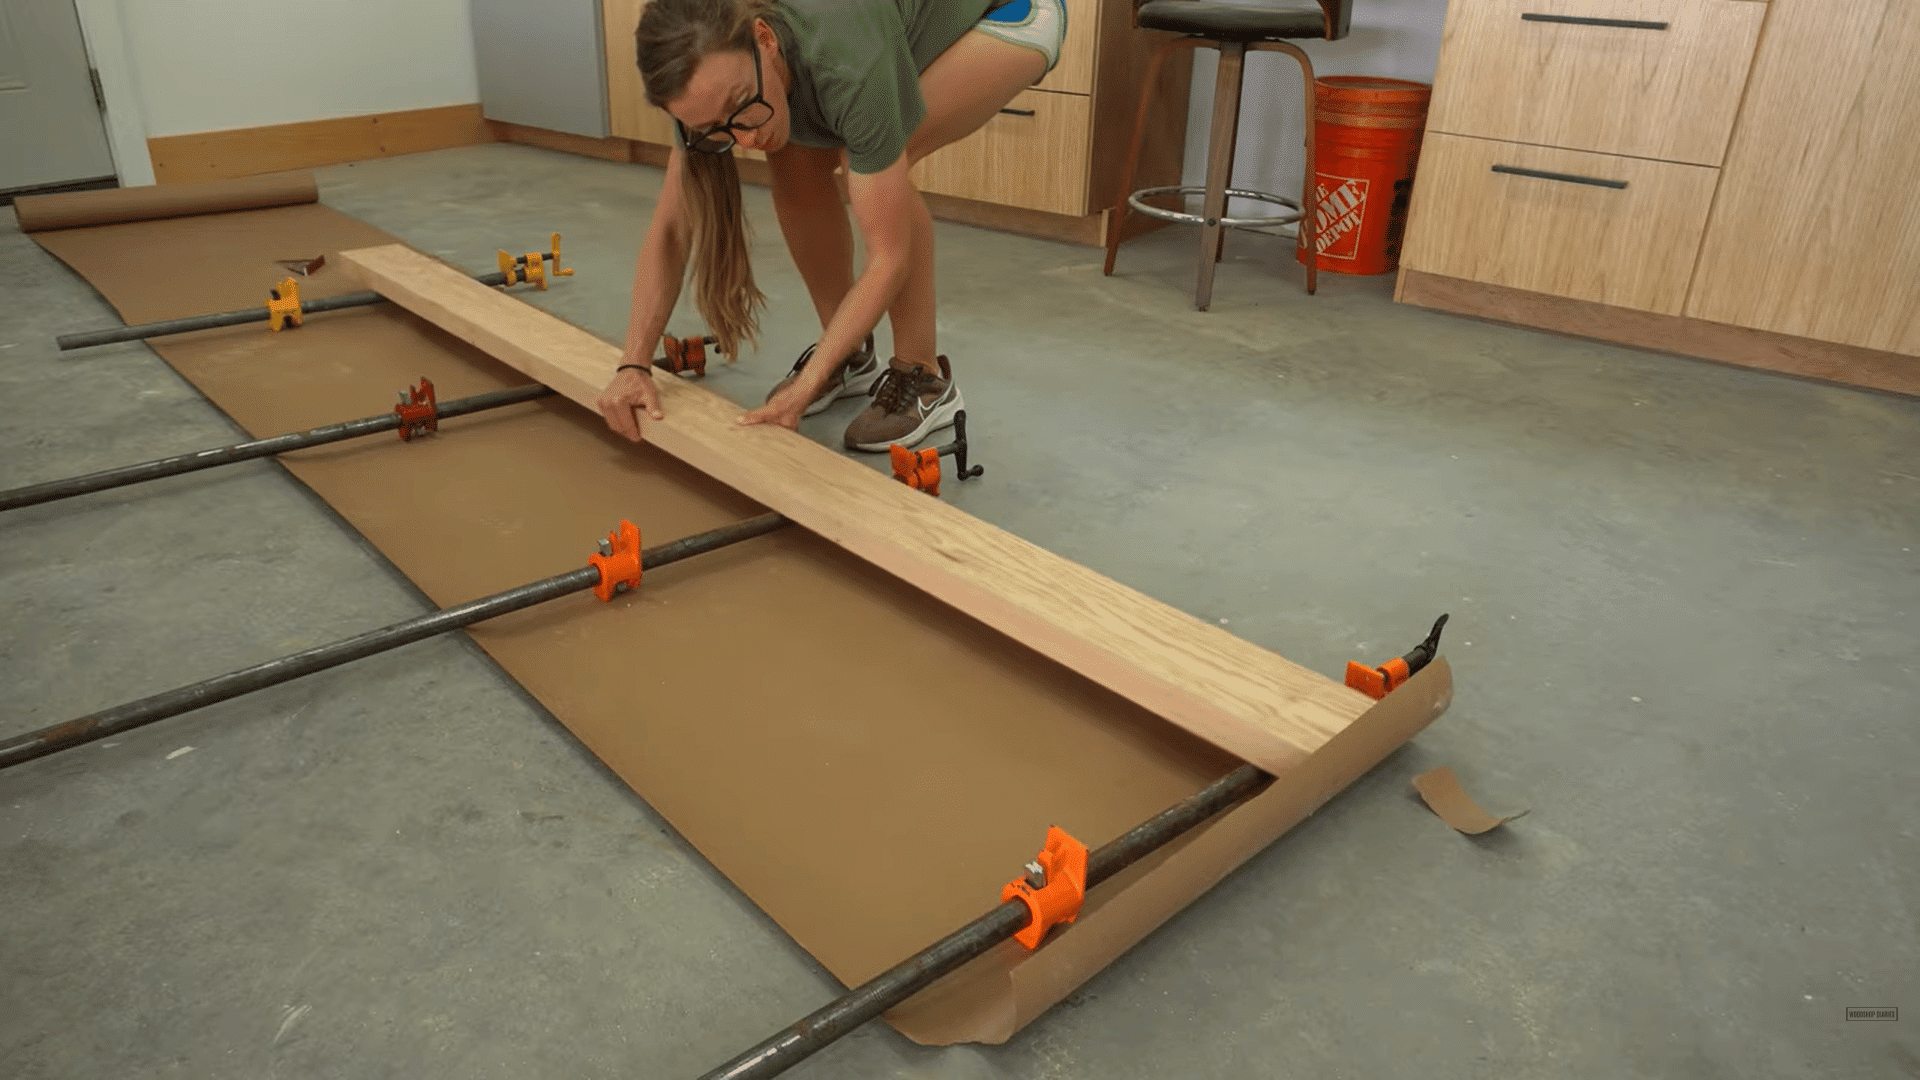
Step 3. Build the New Tabletop
Measure, cut, and prepare the Red Oak boards for the new tabletop. Square the edges carefully so the boards fit tightly together without gaps.
Arrange the boards in a visually pleasing pattern that highlights the natural grain and color variations. Once satisfied with the layout, glue and clamp the boards together securely.
Allow enough drying time so the tabletop becomes strong and solid, ready for finishing work.
Step 4. Sand the Tabletop
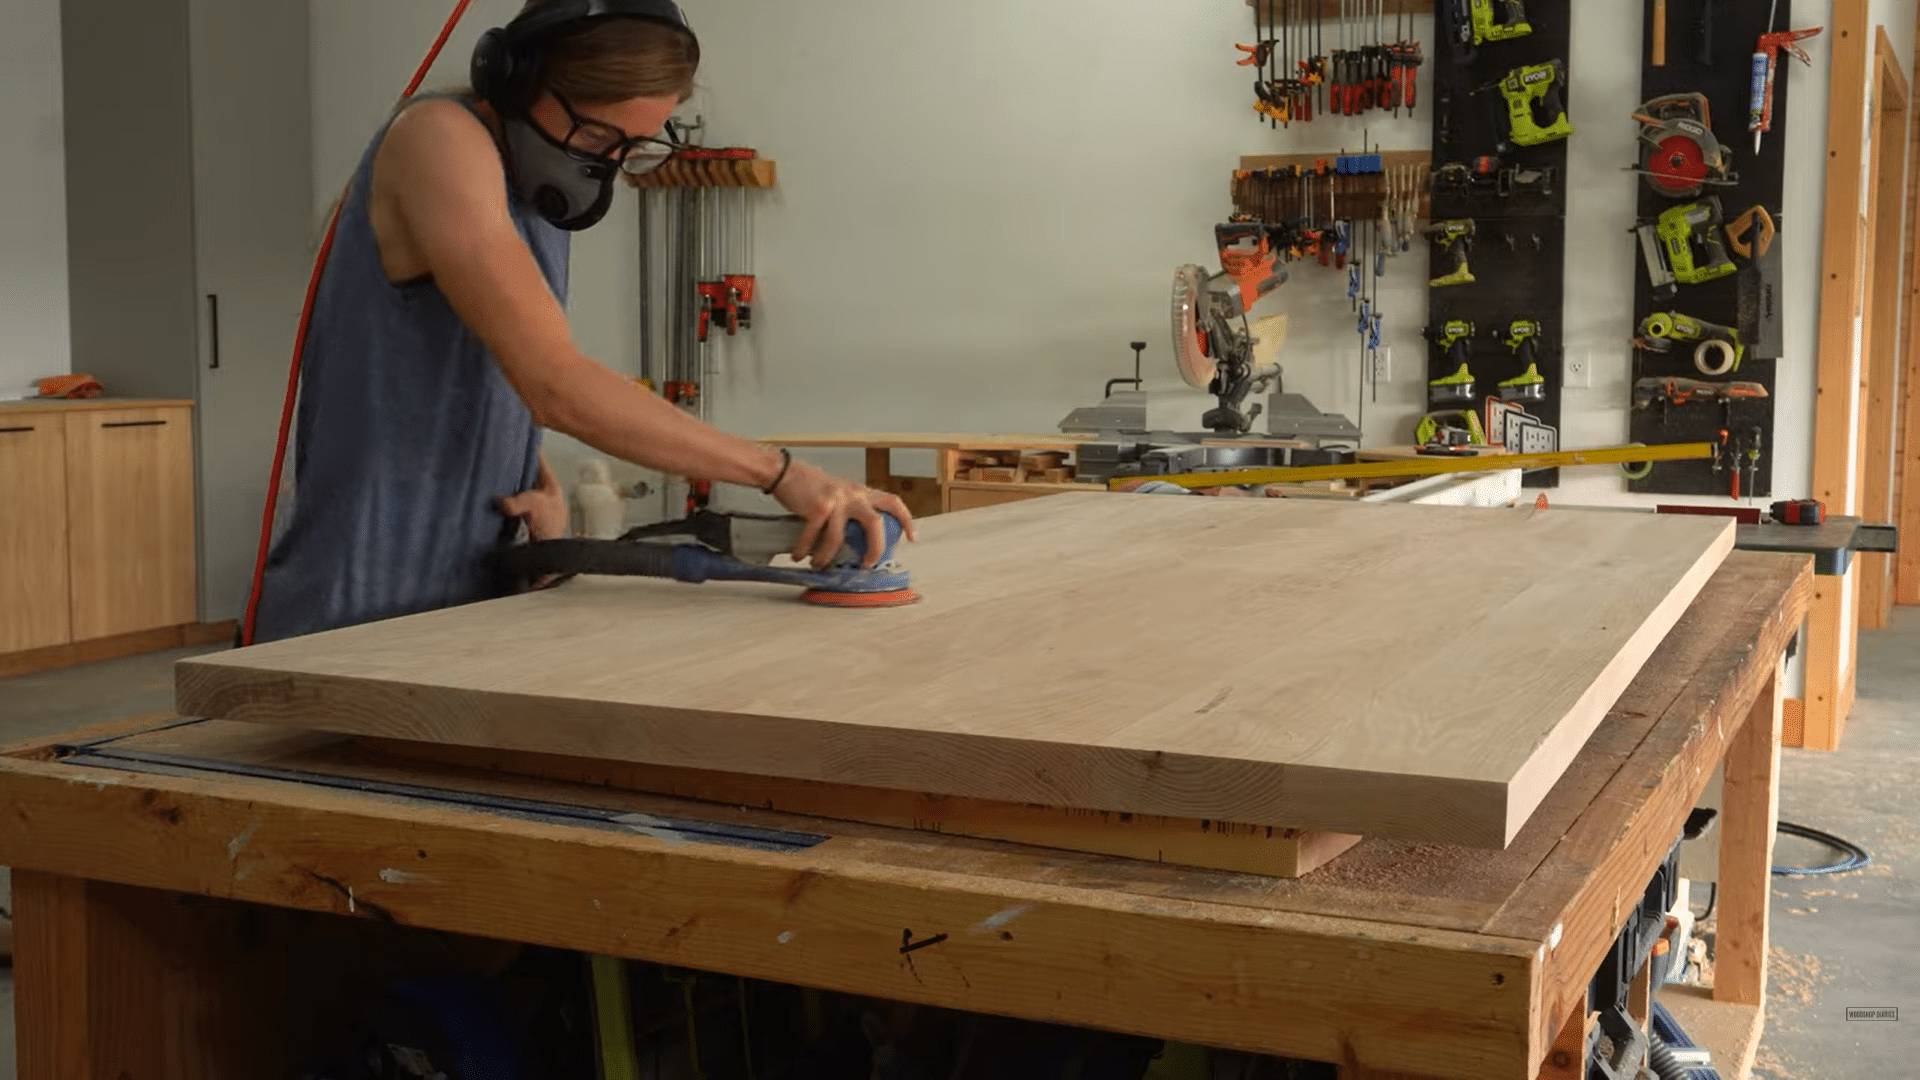
After the glued tabletop has dried completely, begin sanding the surface to remove uneven areas, glue residue, and rough spots.
Start with coarse-grit sandpaper and gradually move to finer grits for a smooth finish. Sand the edges and corners evenly to improve comfort and appearance.
Proper sanding prepares the wood for staining, sealing, or painting while giving the tabletop a clean, professional look.
Step 5. Paint and Reassemble the Base

Refinish the repaired table base with paint, stain, or a protective coating that matches the desired style. Allow the finish to dry fully before reassembling the base components.
Install support braces where necessary to improve durability and reduce long-term movement. Tighten all screws, bolts, and joints carefully to ensure the structure remains secure.
This step gives the table both visual appeal and reliable long-term strength.
Step 6. Attach the top
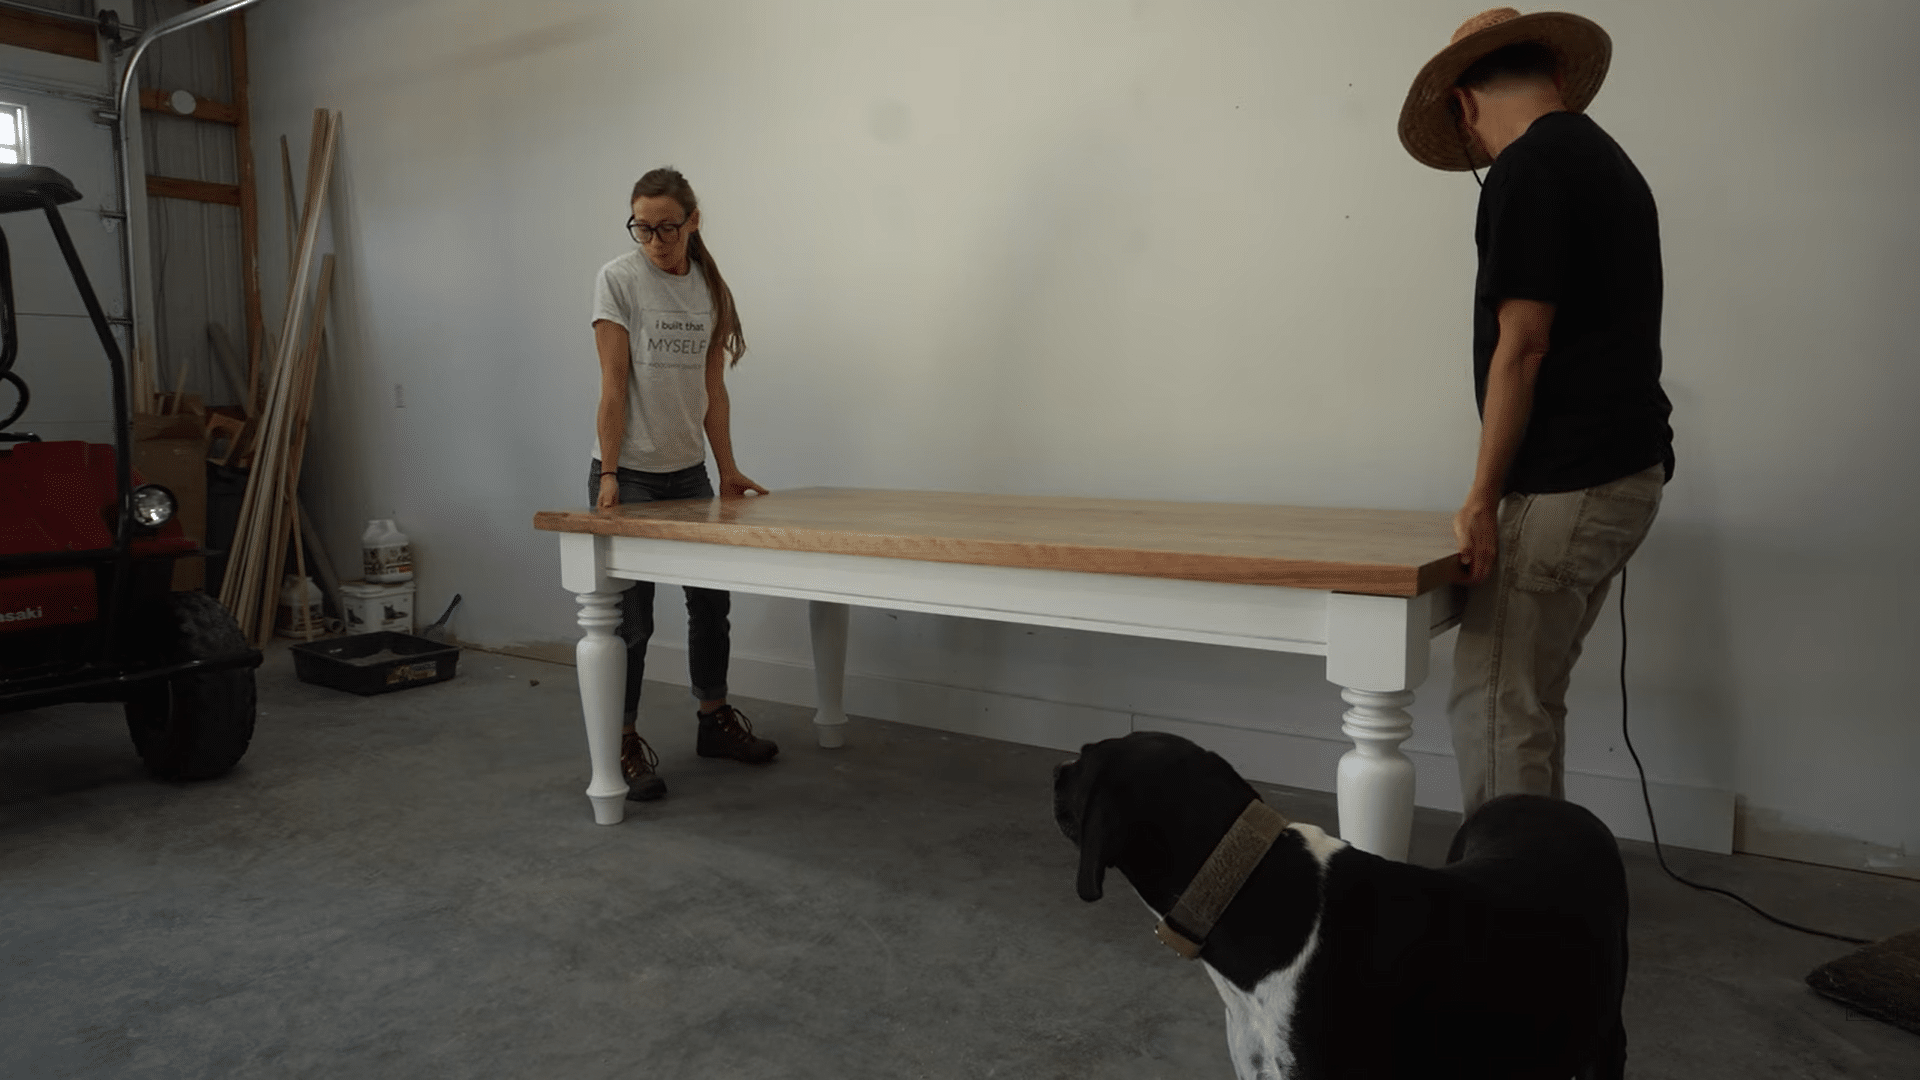
Position the new tabletop carefully on the repaired and refinished base. Make sure the overhang is even on all sides before securing it in place.
Use proper tabletop fasteners or mounting brackets that allow the wood to expand and contract naturally with changes in temperature and humidity.
Check that the table sits level and stable after installation. Correct attachment ensures the dining table remains durable, balanced, and functional for years.
Step 7. The Table is Ready
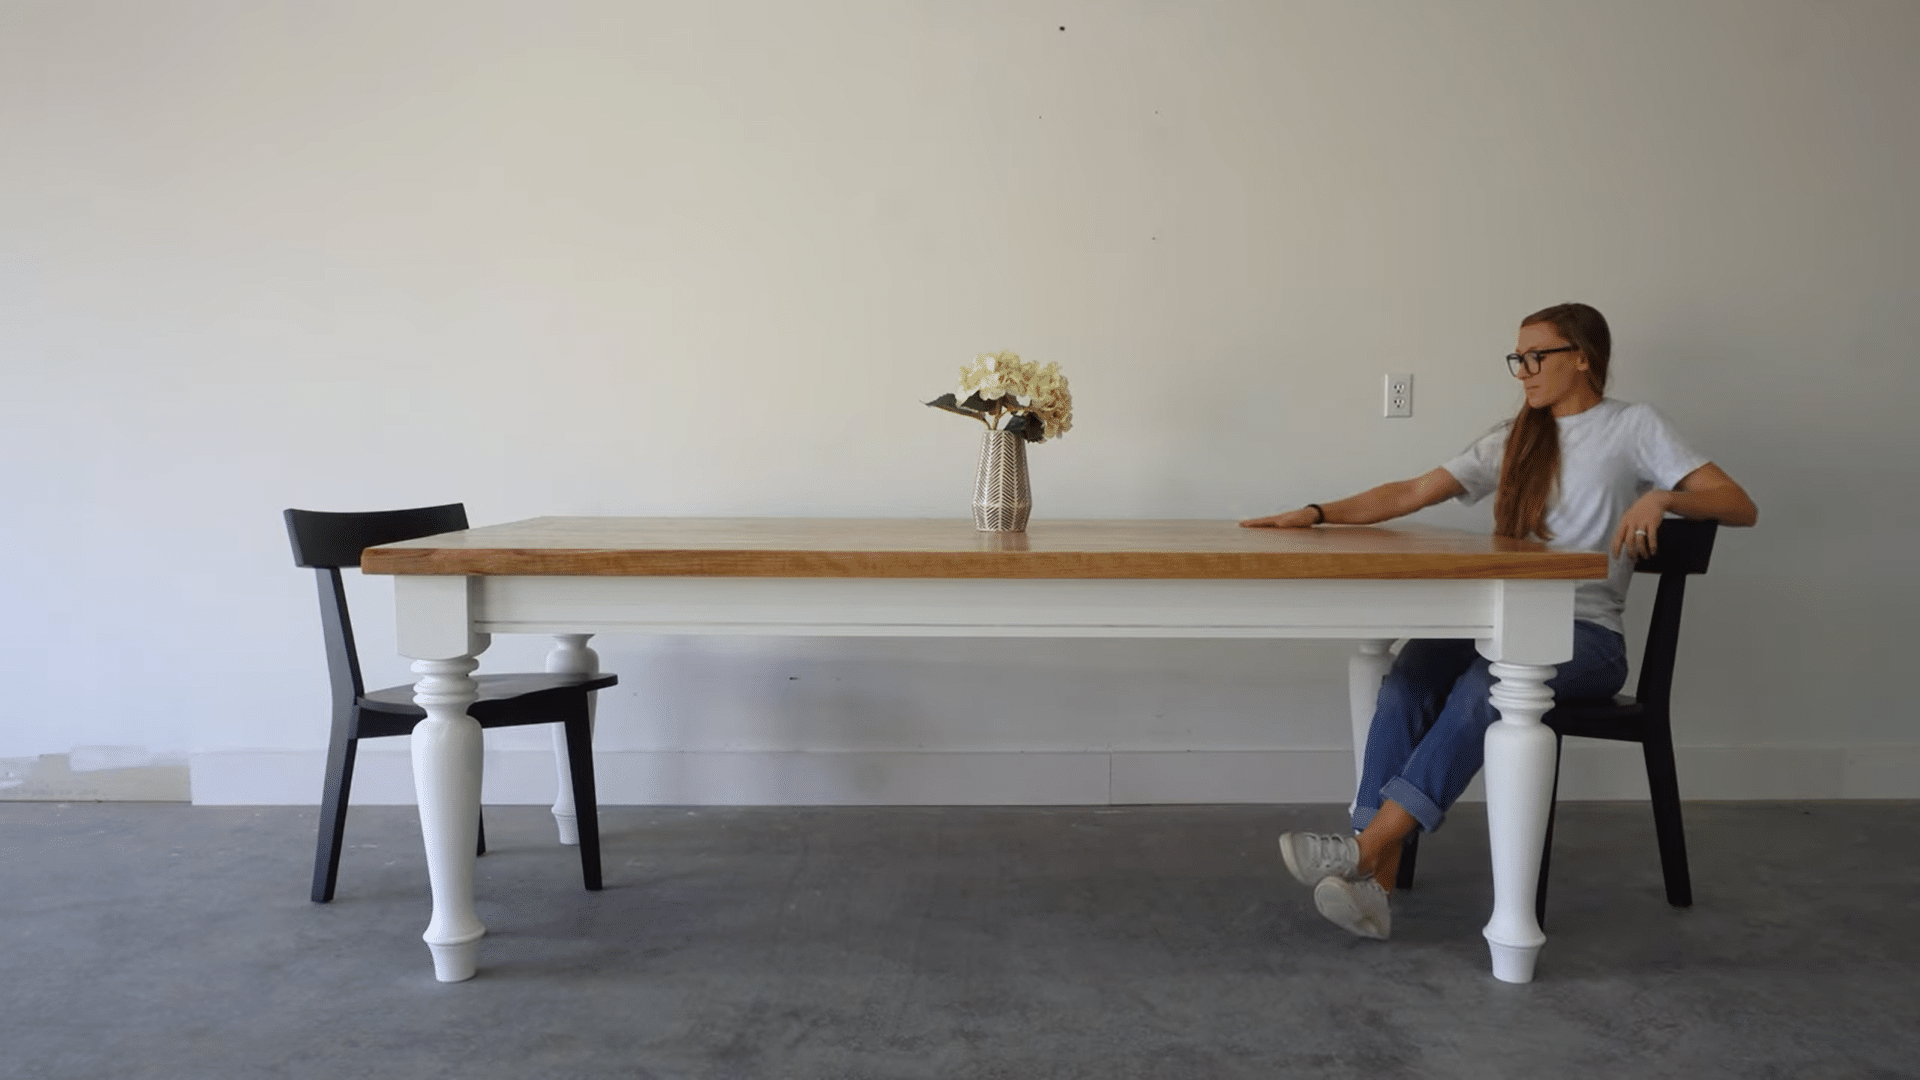
Seeing the finished piece in place makes all the hard work worth it. From raw materials to a beautiful statement piece, this project truly came to life. Now it’s ready to be filled with meals, memories, and everyday moments for years to come.
This tutorial is based on a helpful video by Shara Woodshop Diaries You can check out the original video on their Youtube channel or watch it below.
DIY Kitchen Table Ideas
Turn basic materials into Beautiful furniture with these creative DIY kitchen table ideas.
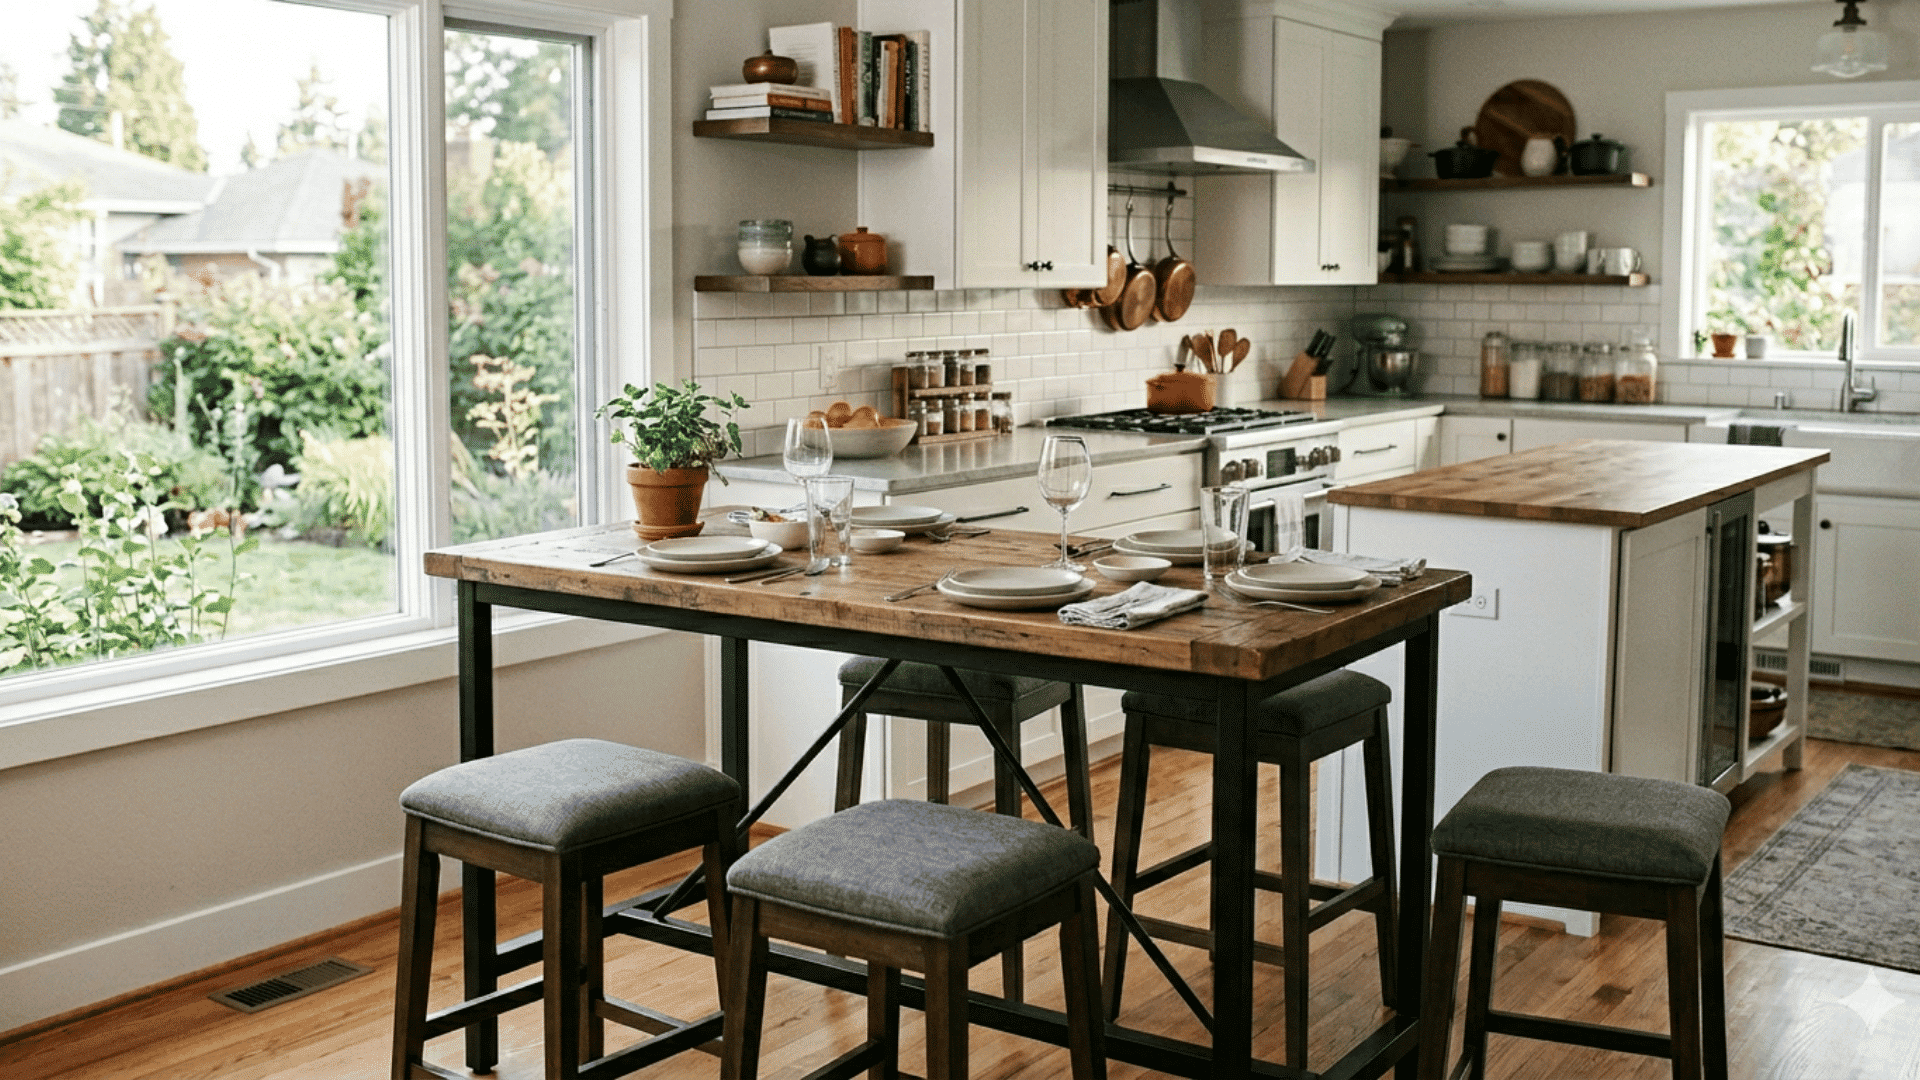
1. Classic Farmhouse Dining Table
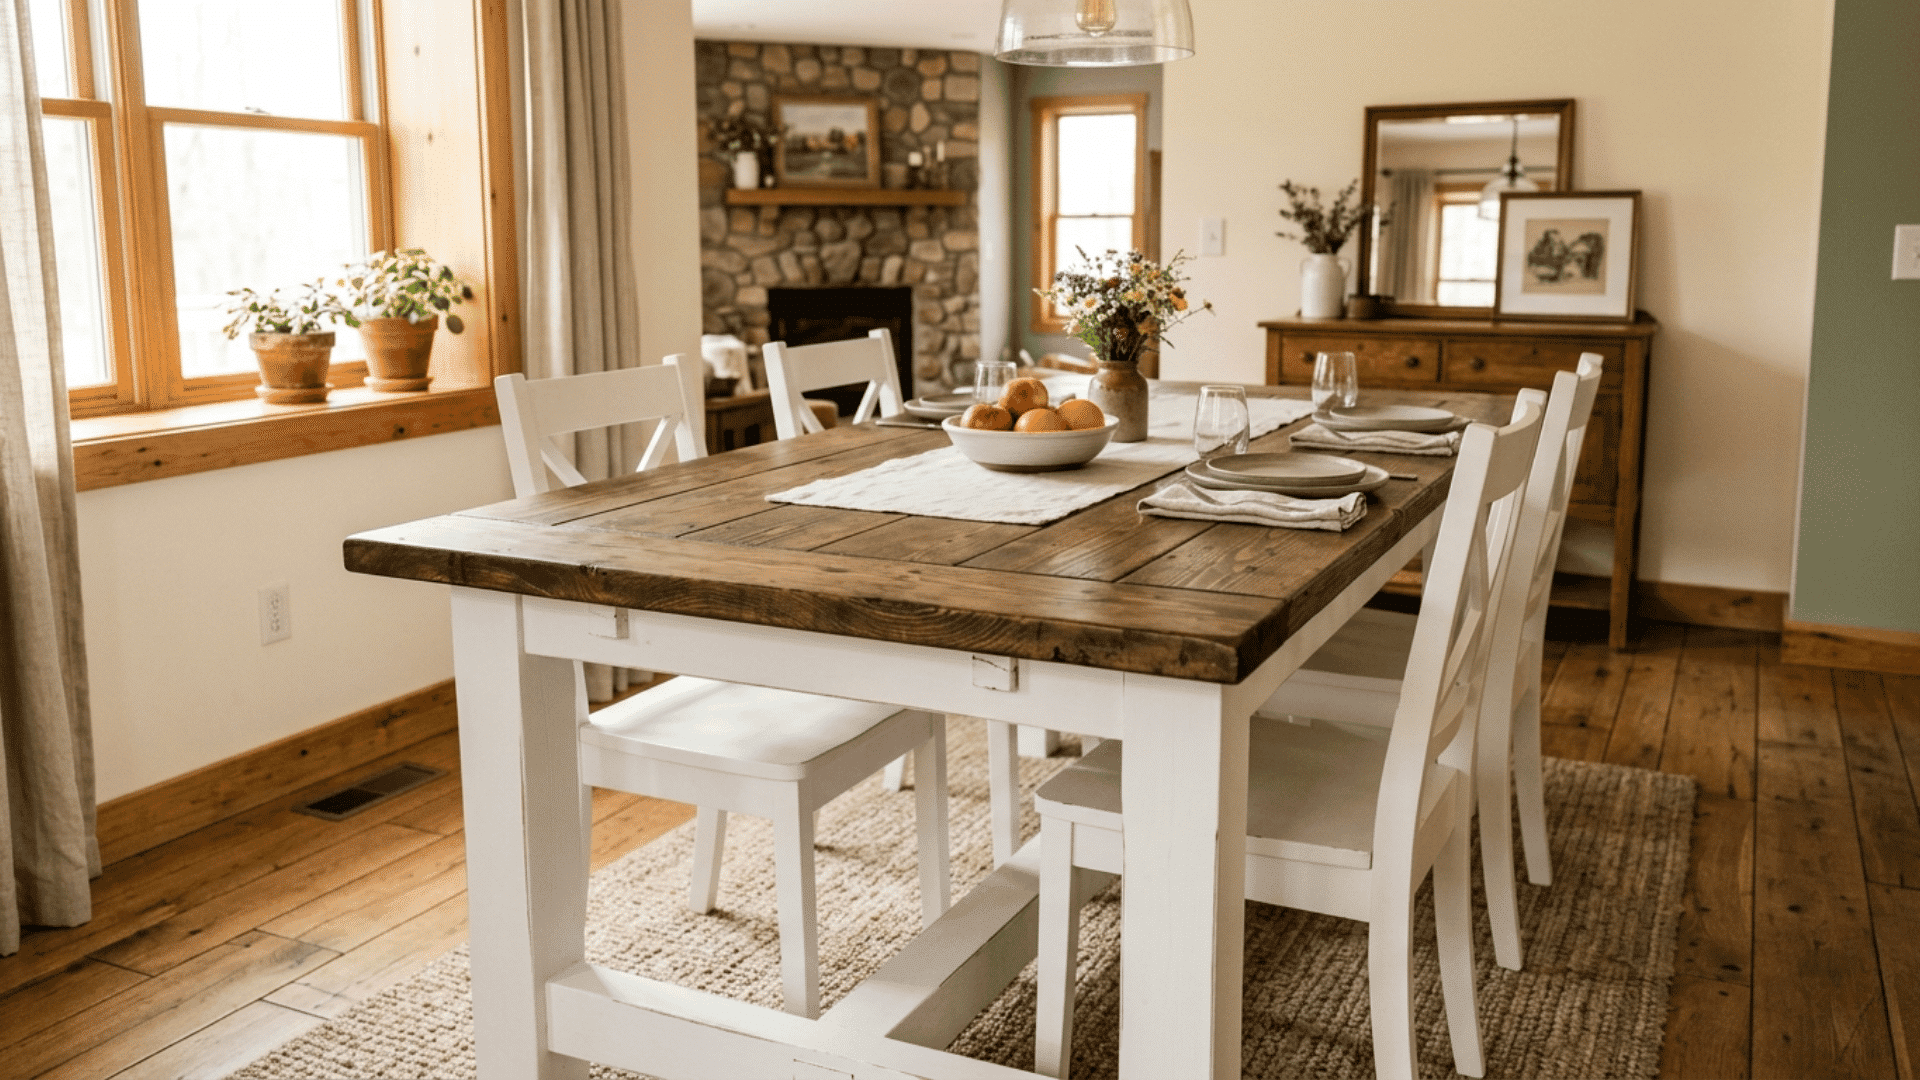
Skill Level: Beginner | Cost: ~$150
This is the one that started it all. A white painted base with a wood-stained top, it’s a look that never gets old. You’ll use 2×12 boards, chunky legs, and pocket holes to assemble it.
I’ve seen this style in so many homes because the white base and stained wood top give it a timeless farmhouse look that works anywhere
Best for: Traditional and country-style homes
What You’ll Need
- 2×12 boards
- Chunky table legs
- Pocket hole jig
- Wood stain + paint
2. Modern Farmhouse Table
Skill Level: Beginner | Cost: ~$100
Clean lines, a rustic wood top, and a simple base make this one of the most popular homemade dining table builds out there.
You can build this for under $120 with just a circular saw, drill, and biscuit joiner.
Best for: Contemporary homes that want a warm, cozy feel
What You’ll Need
- Circular saw
- Biscuit joiner or dowels
- Pipe clamps
- Sander
3. Bar Height Dining Table
Skill Level: Intermediate | Cost: ~$200
Want something a little different? A bar height table pairs perfectly with bar stools and gives your kitchen a fun, casual vibe.
This build has some angled cuts, so it takes a little more effort, but the result is totally worth it.
Best for: Open-plan kitchens and entertainment spaces
What You’ll Need
- Miter saw
- Drill/driver
- Dark wood stain
- Bar-height legs (40–42”)
4. Round Pedestal Dining Table
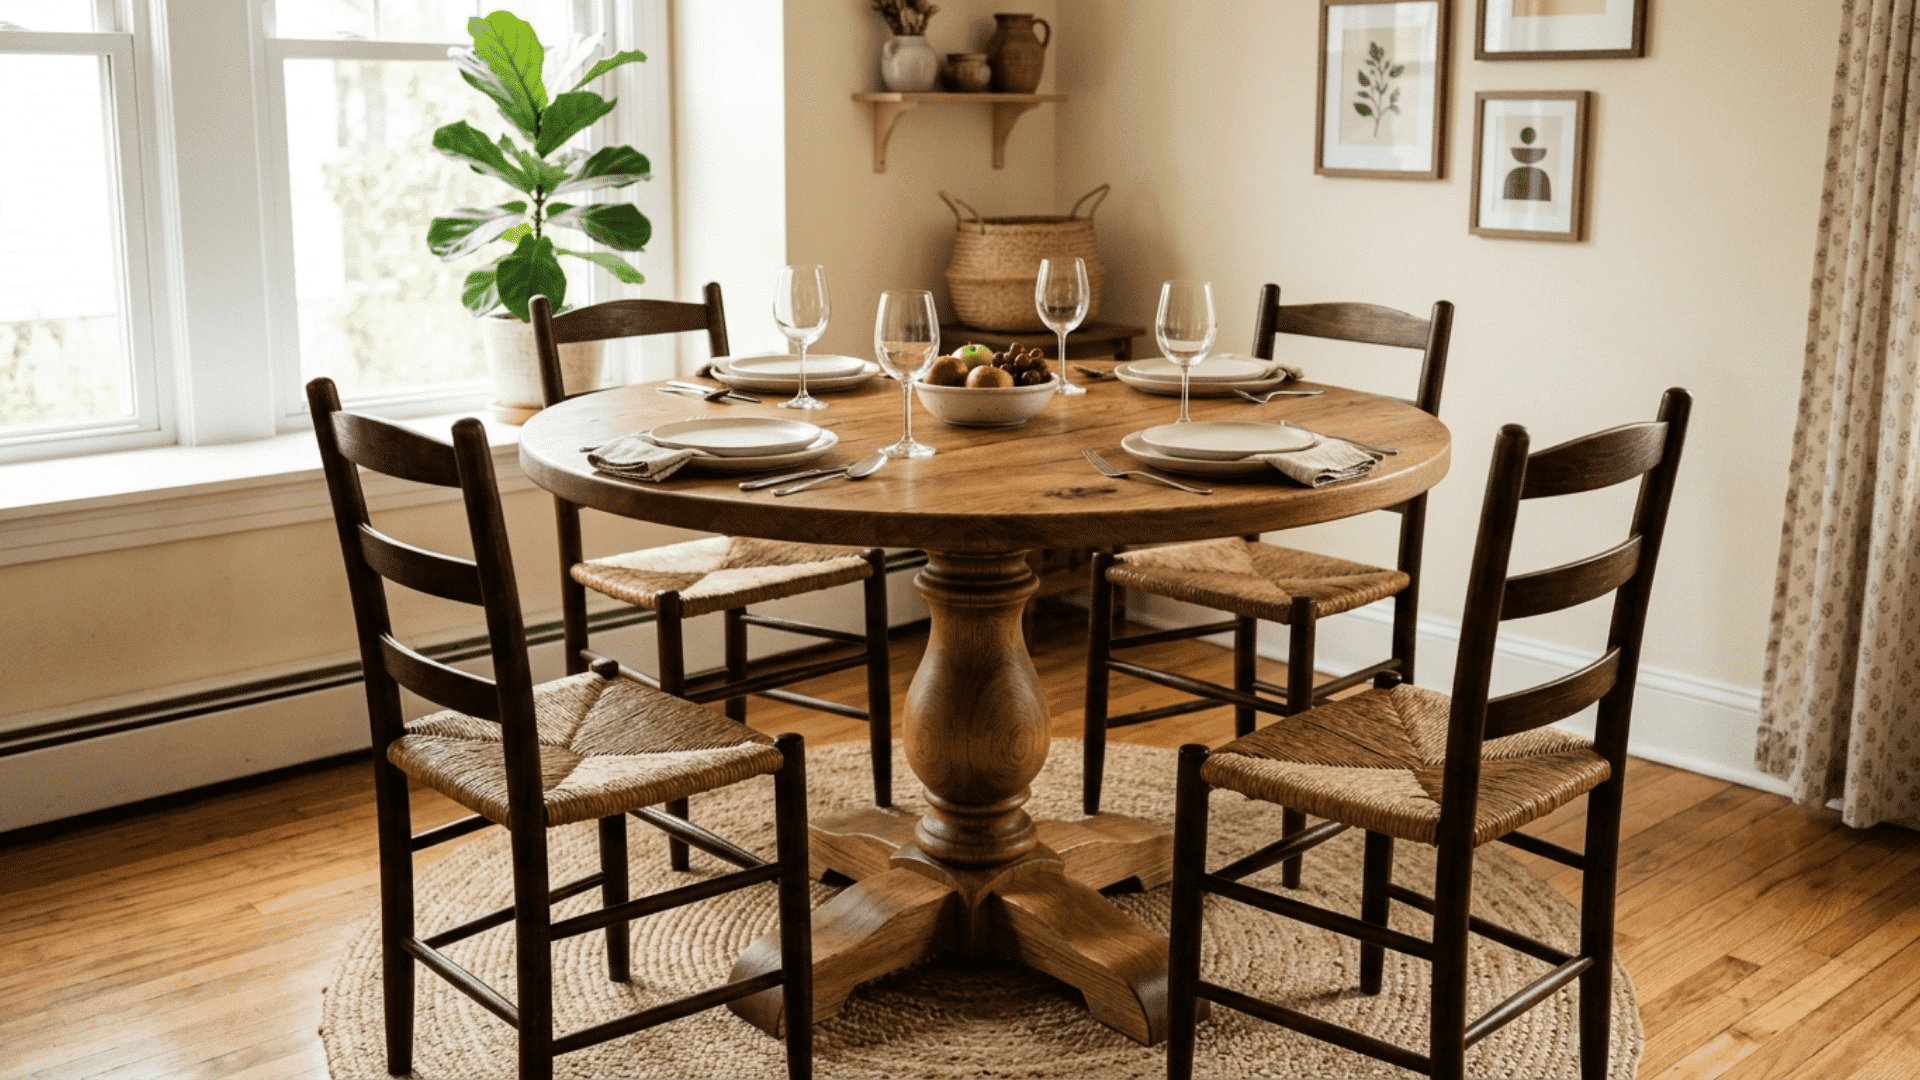
Skill Level: Beginner–Intermediate | Cost: ~$300
A round table is a great pick for smaller spaces. The single pedestal base keeps the floor area open and lets you seat more people comfortably.
You can also make the top larger to fit extra guests.
Best for: Small dining rooms and cozy breakfast nooks
What You’ll Need
- Jigsaw or router
- 4×4 post for pedestal
- Wood glue + clamps
- Sandpaper (80–220 grit)
5. Live Edge Dining Table
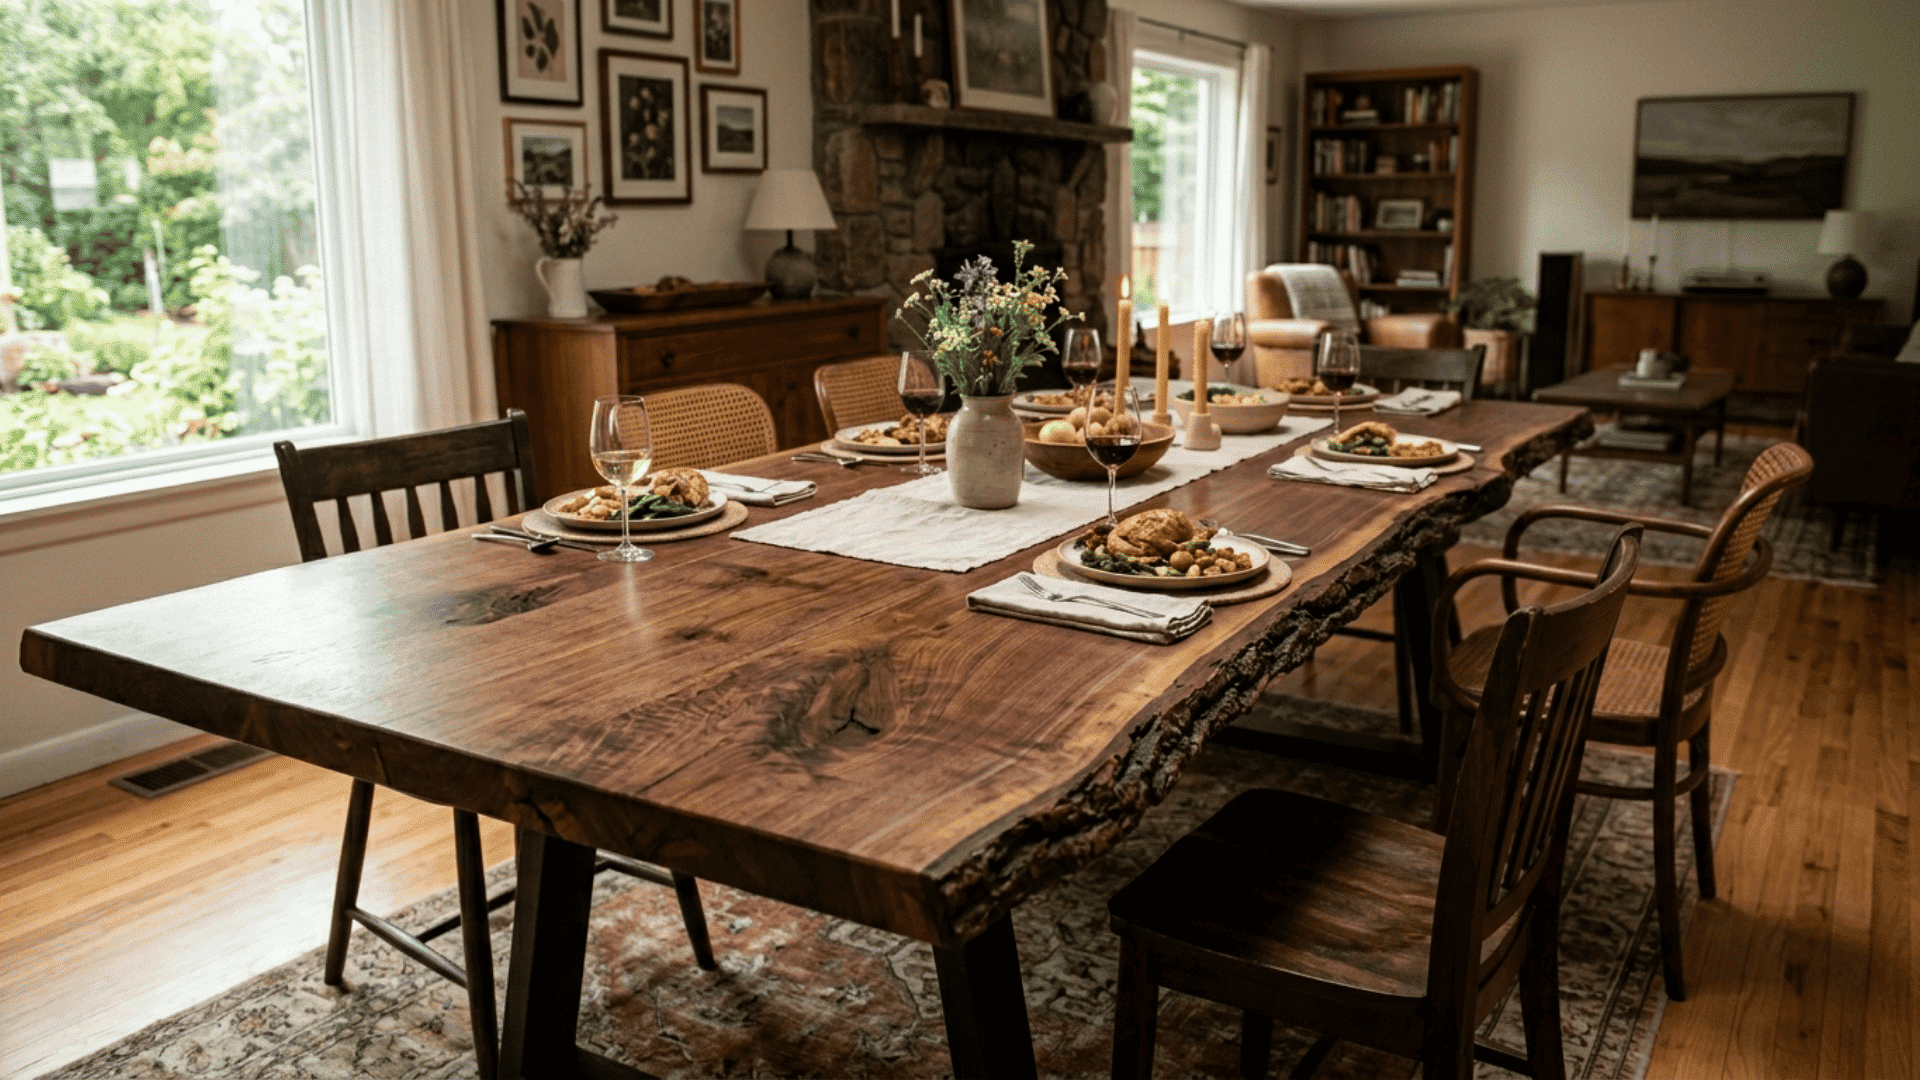
Skill Level: Intermediate | Cost: ~$400
A live-edge table uses the natural, raw edge of a wood slab, so no two tables ever look the same. It’s one of the most eye-catching homemade dining table styles you can build, and it works in almost any room.
Best for: Rustic, organic, and boho-style interiors
What You’ll Need
- Live-edge wood slab
- Hairpin or metal legs
- Epoxy (for cracks/knots)
- Wood finish/oil
6. Hairpin Leg Dining Table
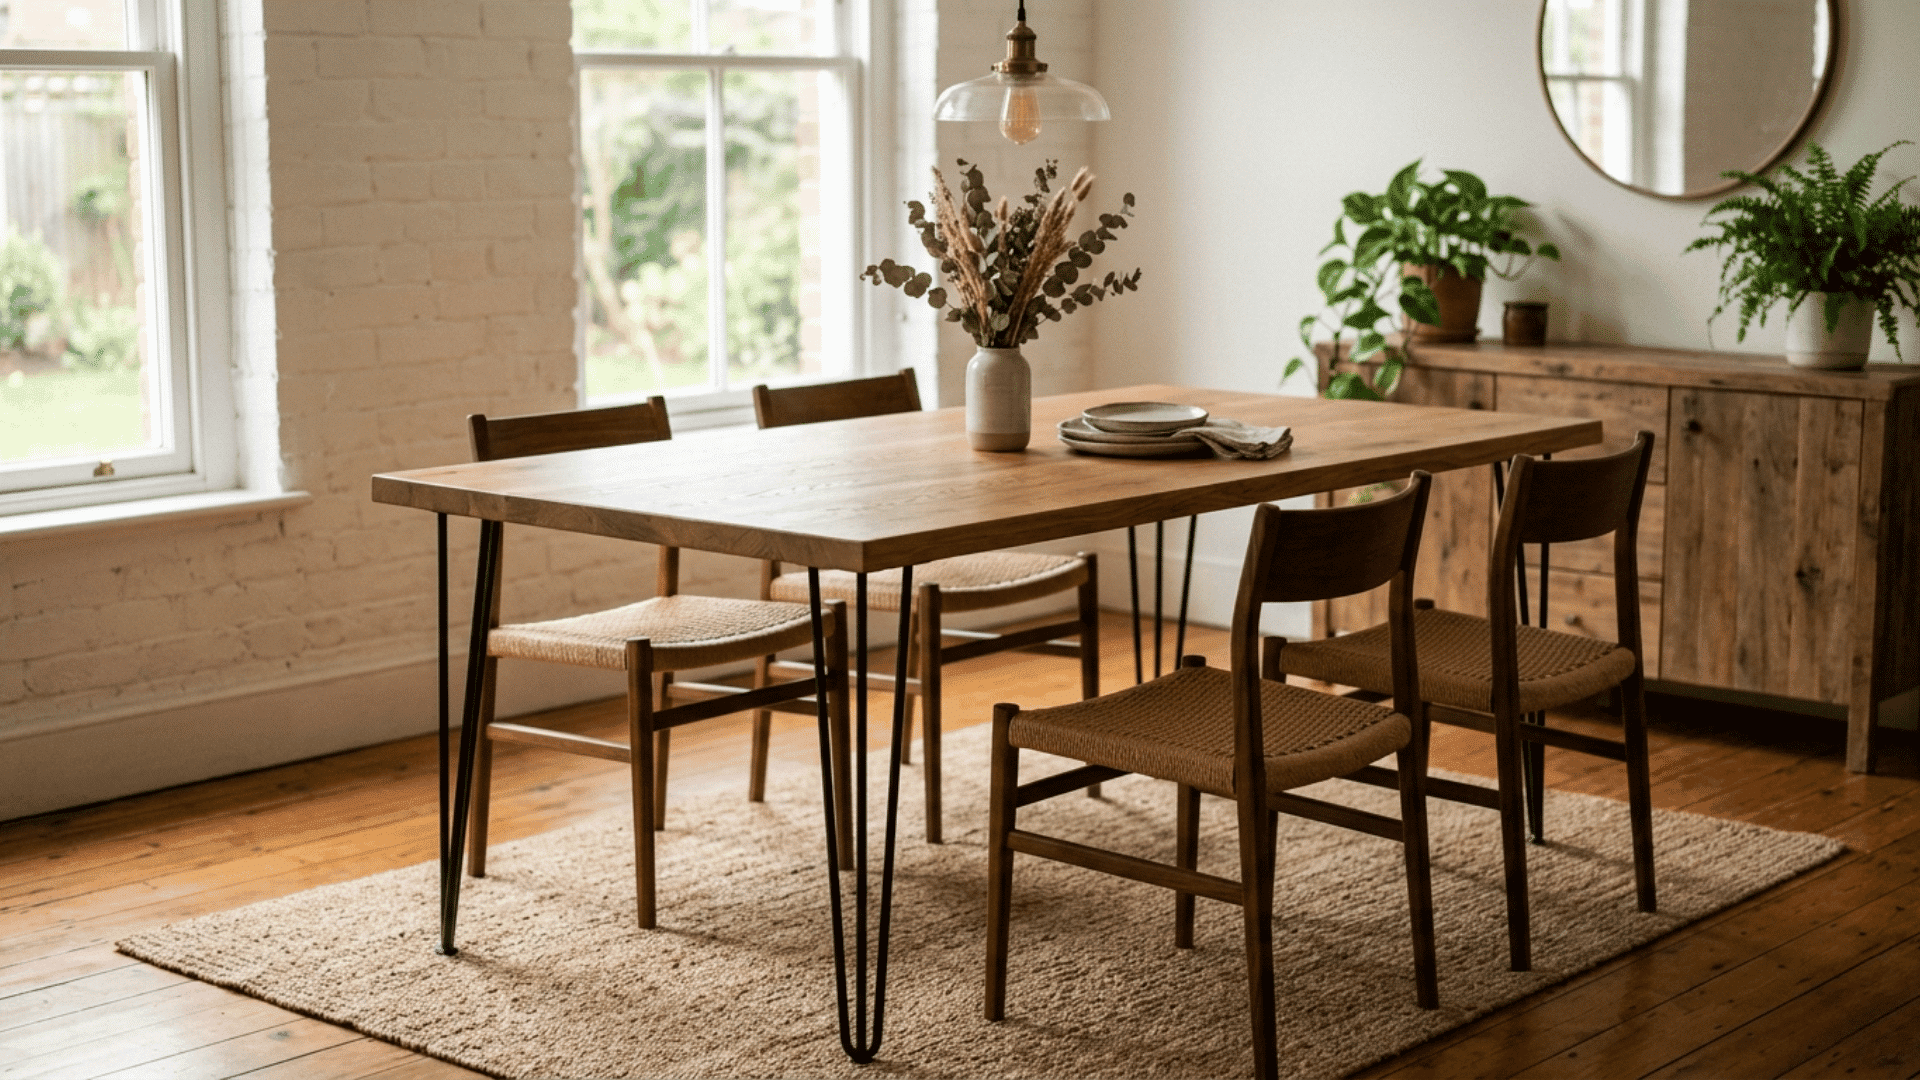
Skill Level: Beginner | Cost: ~$120
This is one of the quickest and easiest builds on the list. You simply attach metal hairpin legs to a wood top, no welding, no complicated joinery.
It gives you that cool mix of wood and metal without the extra work.
A friend made this over a weekend, and the hairpin legs gave the table a modern look with almost no complicated building involved.
Best for: Minimalist, Scandi, and mid-century modern homes
What You’ll Need
- 1×12 boards
- Metal hairpin legs
- Galvanized straps
- Clear semi-gloss stain
7. Herringbone Top Dining Table
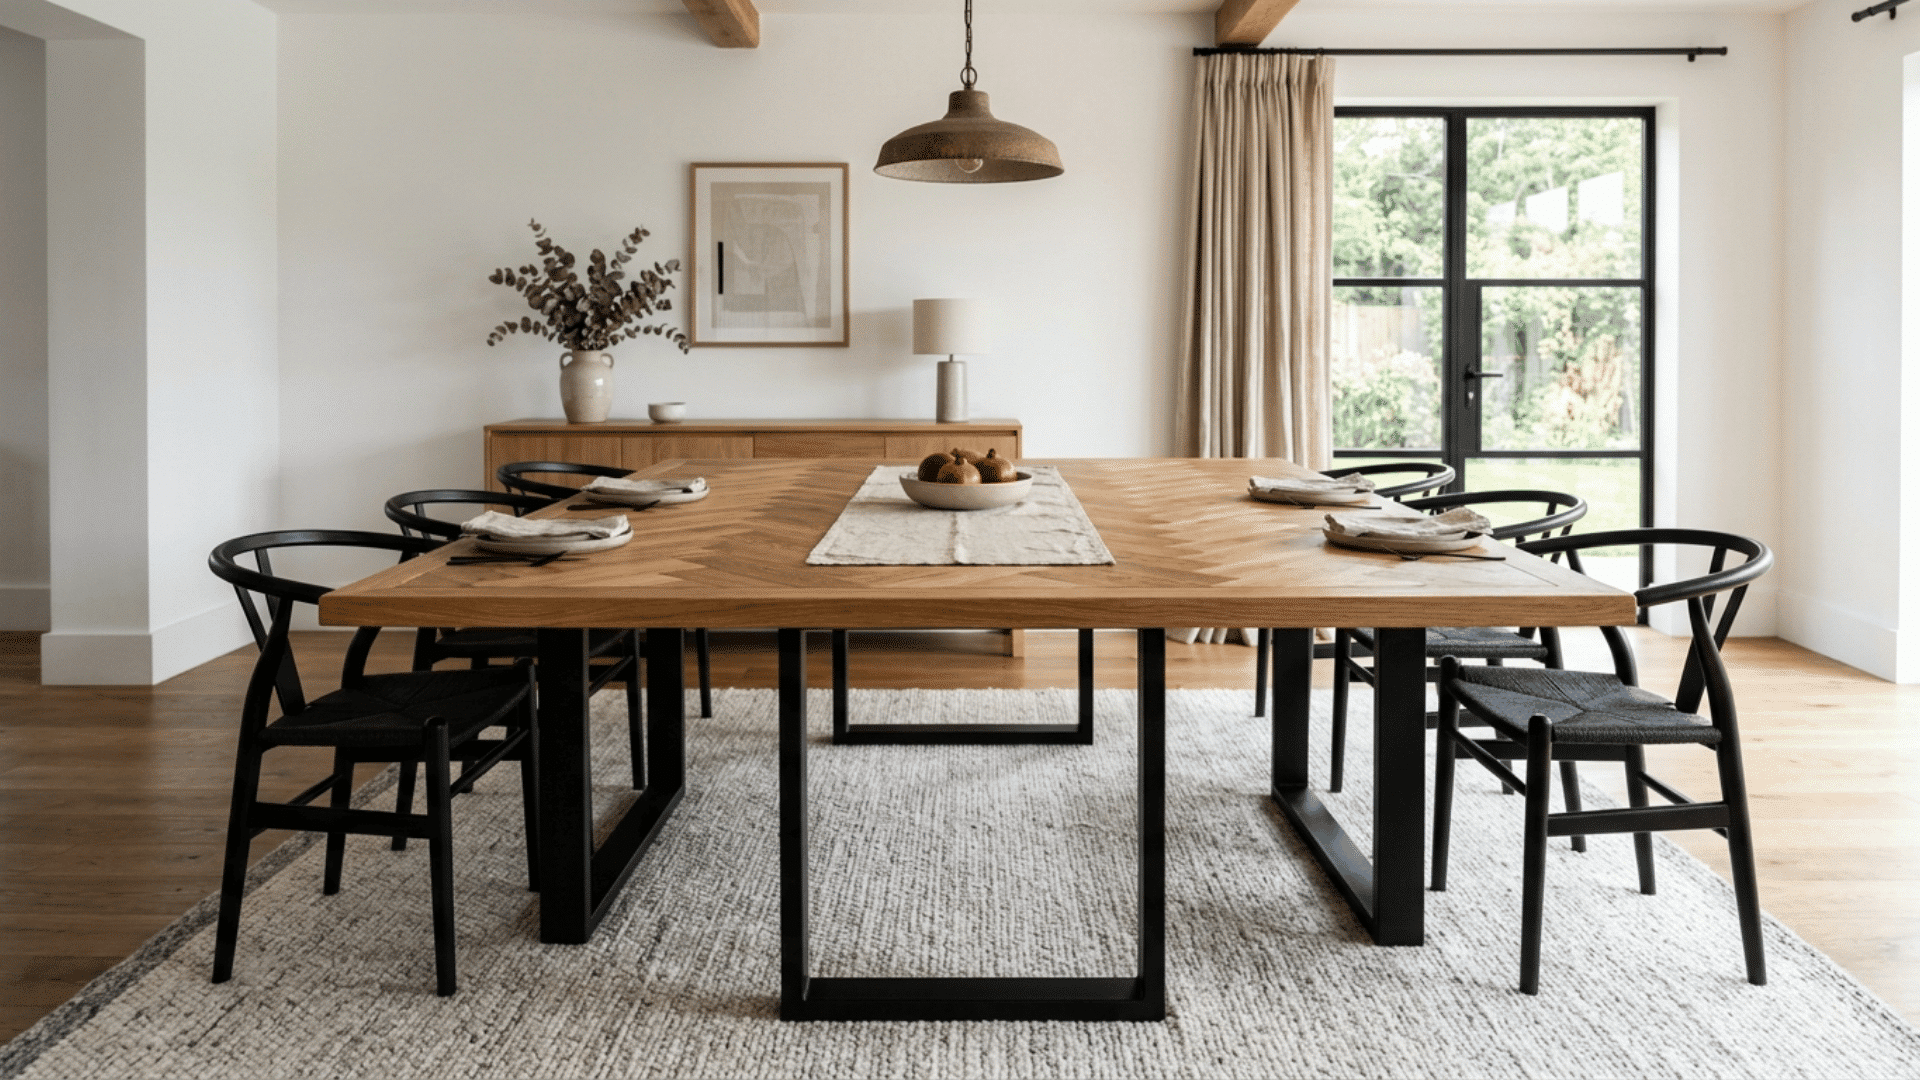
Skill Level: Intermediate | Cost: ~$250
If you want a table that really stands out, this is the one.
The herringbone pattern on the top involves lots of miter cuts, but the result looks like something straight out of a design magazine at a fraction of the price.
Best for: Statement pieces in larger dining rooms
What You’ll Need
- Miter saw
- Pocket hole screws
- Brad nails
- Wood glue
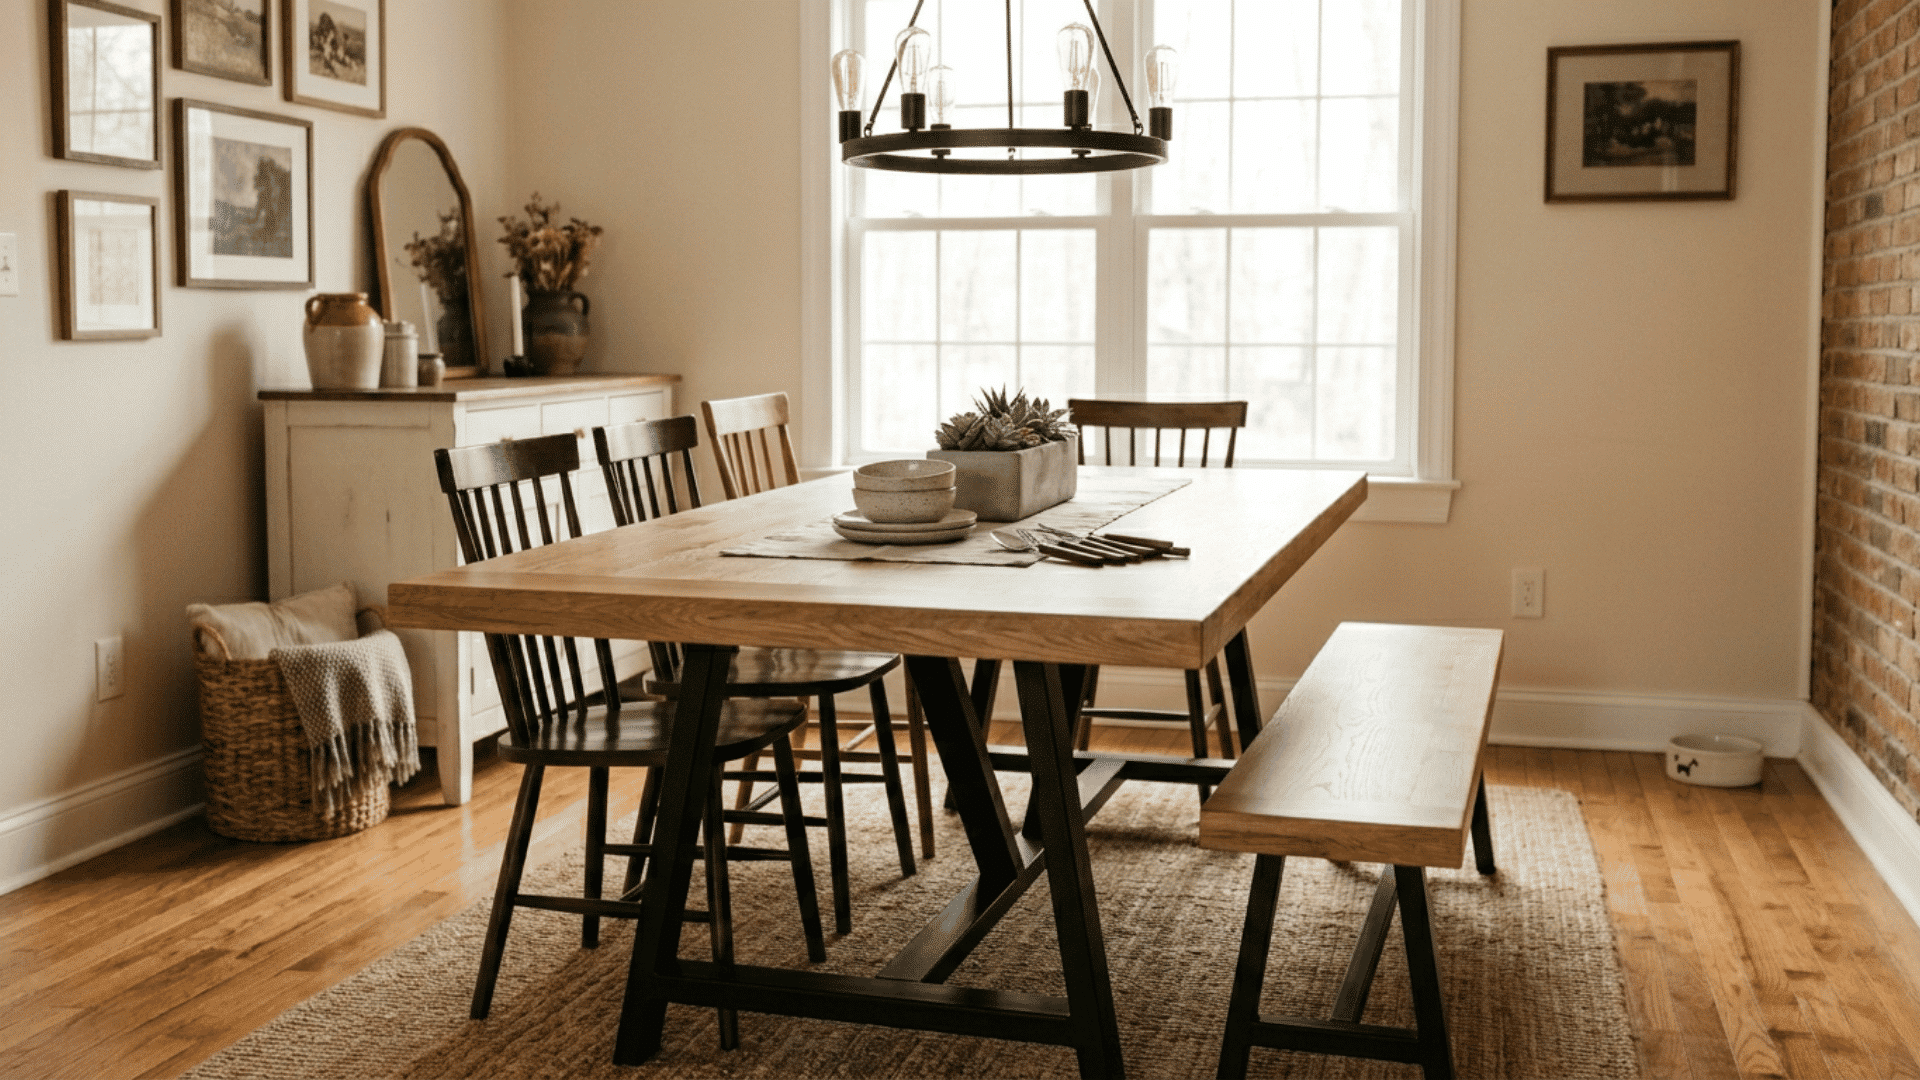
8. Trestle Dining Table
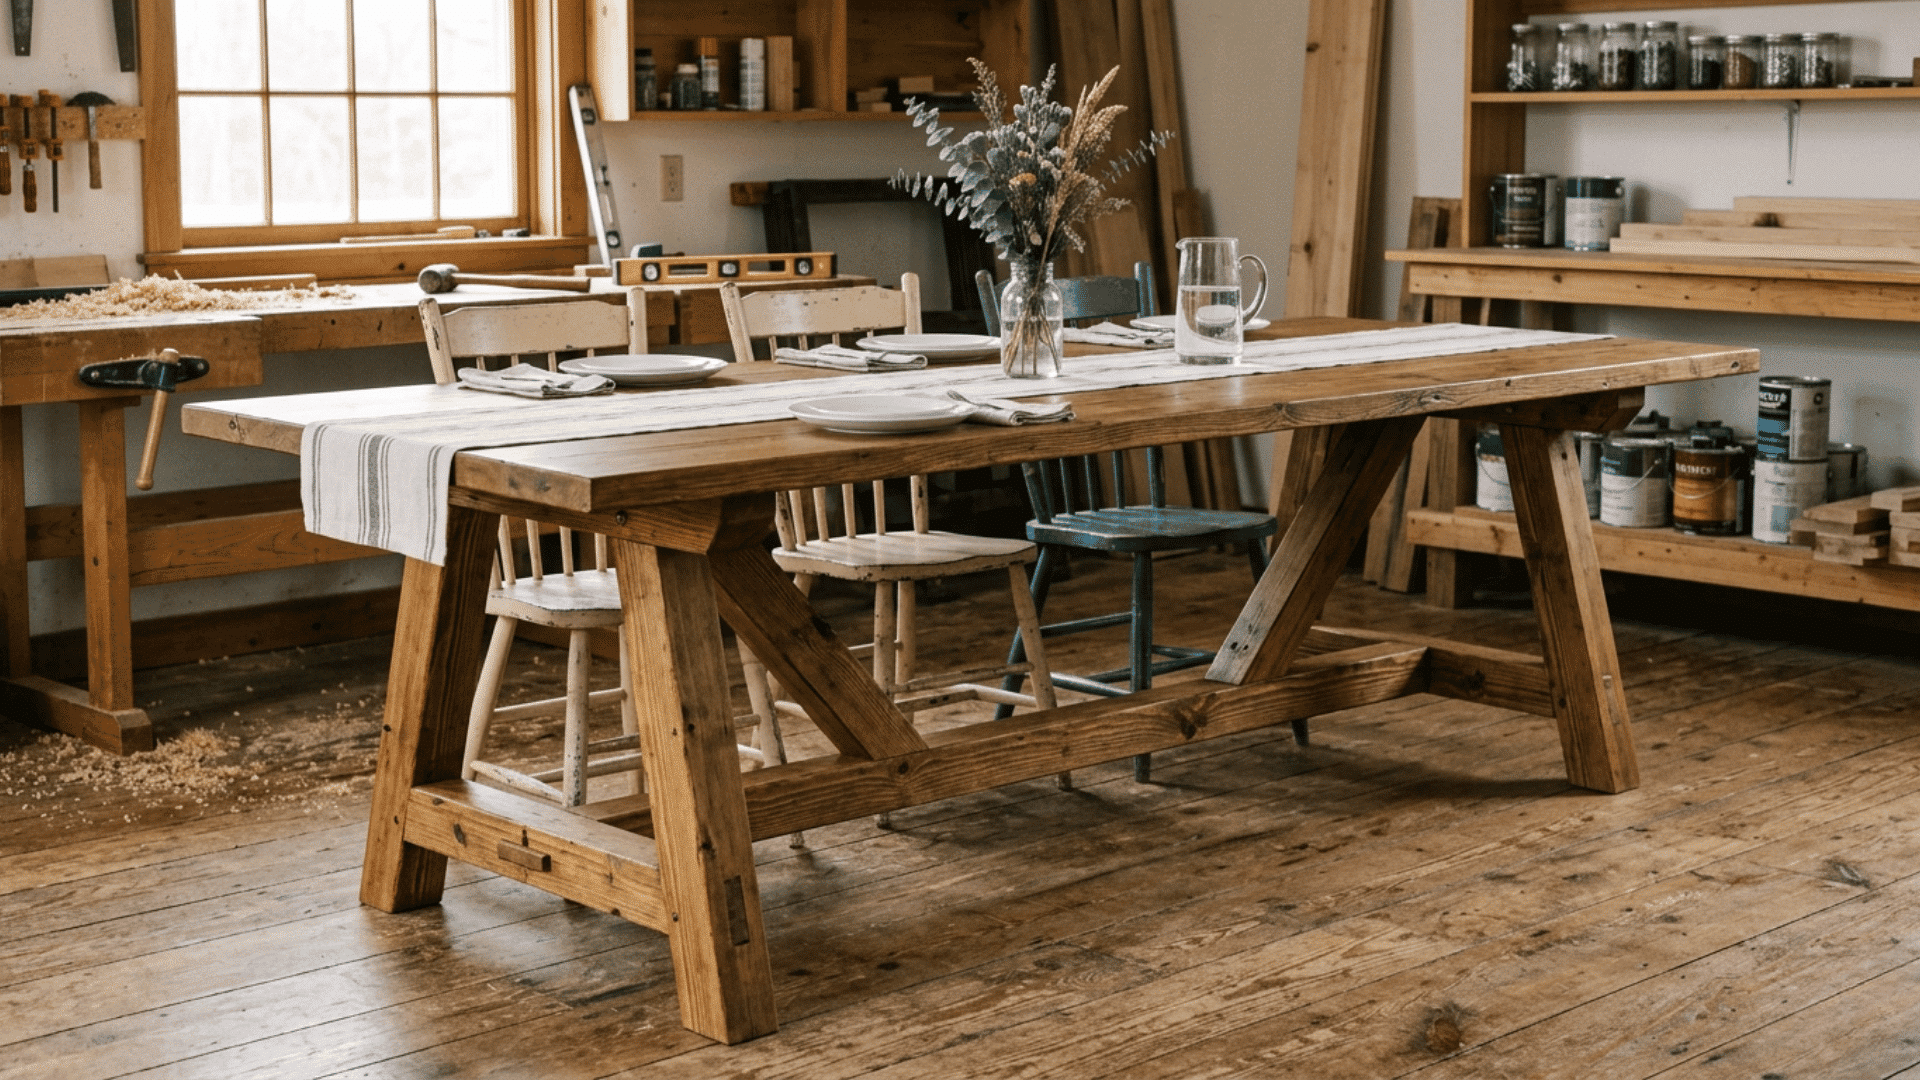
Skill Level: Beginner–Intermediate | Cost: ~$200
A trestle base is one of the most stable designs you can build. It’s great for long tables that need to seat a big crowd, think holiday dinners and family gatherings.
The A-frame base spreads the weight evenly so the table stays rock solid.
Best for: Large families and farmhouse dining rooms
What You’ll Need
- 2×6 boards
- 1×12 boards
- Trestle leg kit or lumber
- Pocket hole jig
9. Reclaimed Wood Dining Table
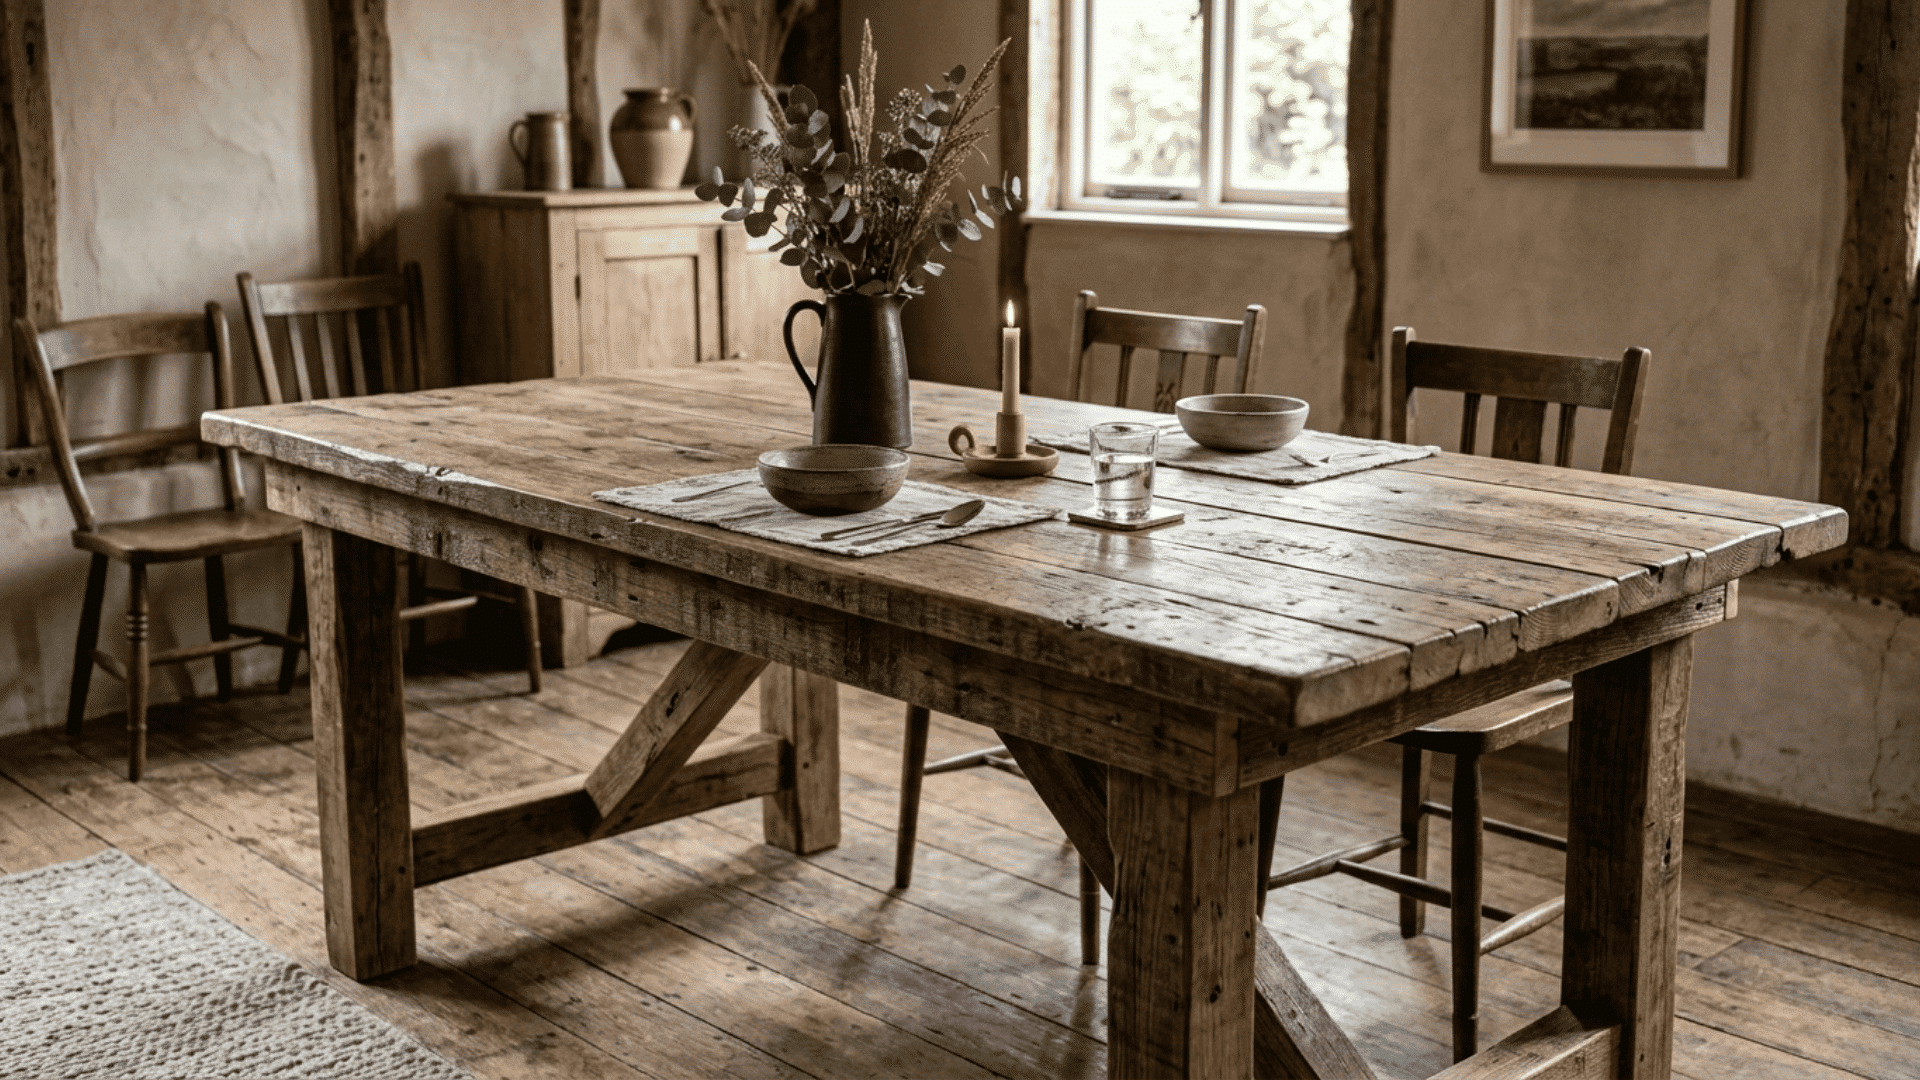
Skill Level: Intermediate | Cost: ~$150
Got some old barn wood, pallets, or salvaged timber lying around? Put it to good use!
Reclaimed wood tables have a character and warmth that brand-new lumber can’t match. Every scratch and mark tells a story.
Best for: Eco-friendly builds and rustic interiors
What You’ll Need
- Salvaged/reclaimed wood
- Belt sander
- Circular saw
- Protective wood finish
10. Outdoor Dining Table
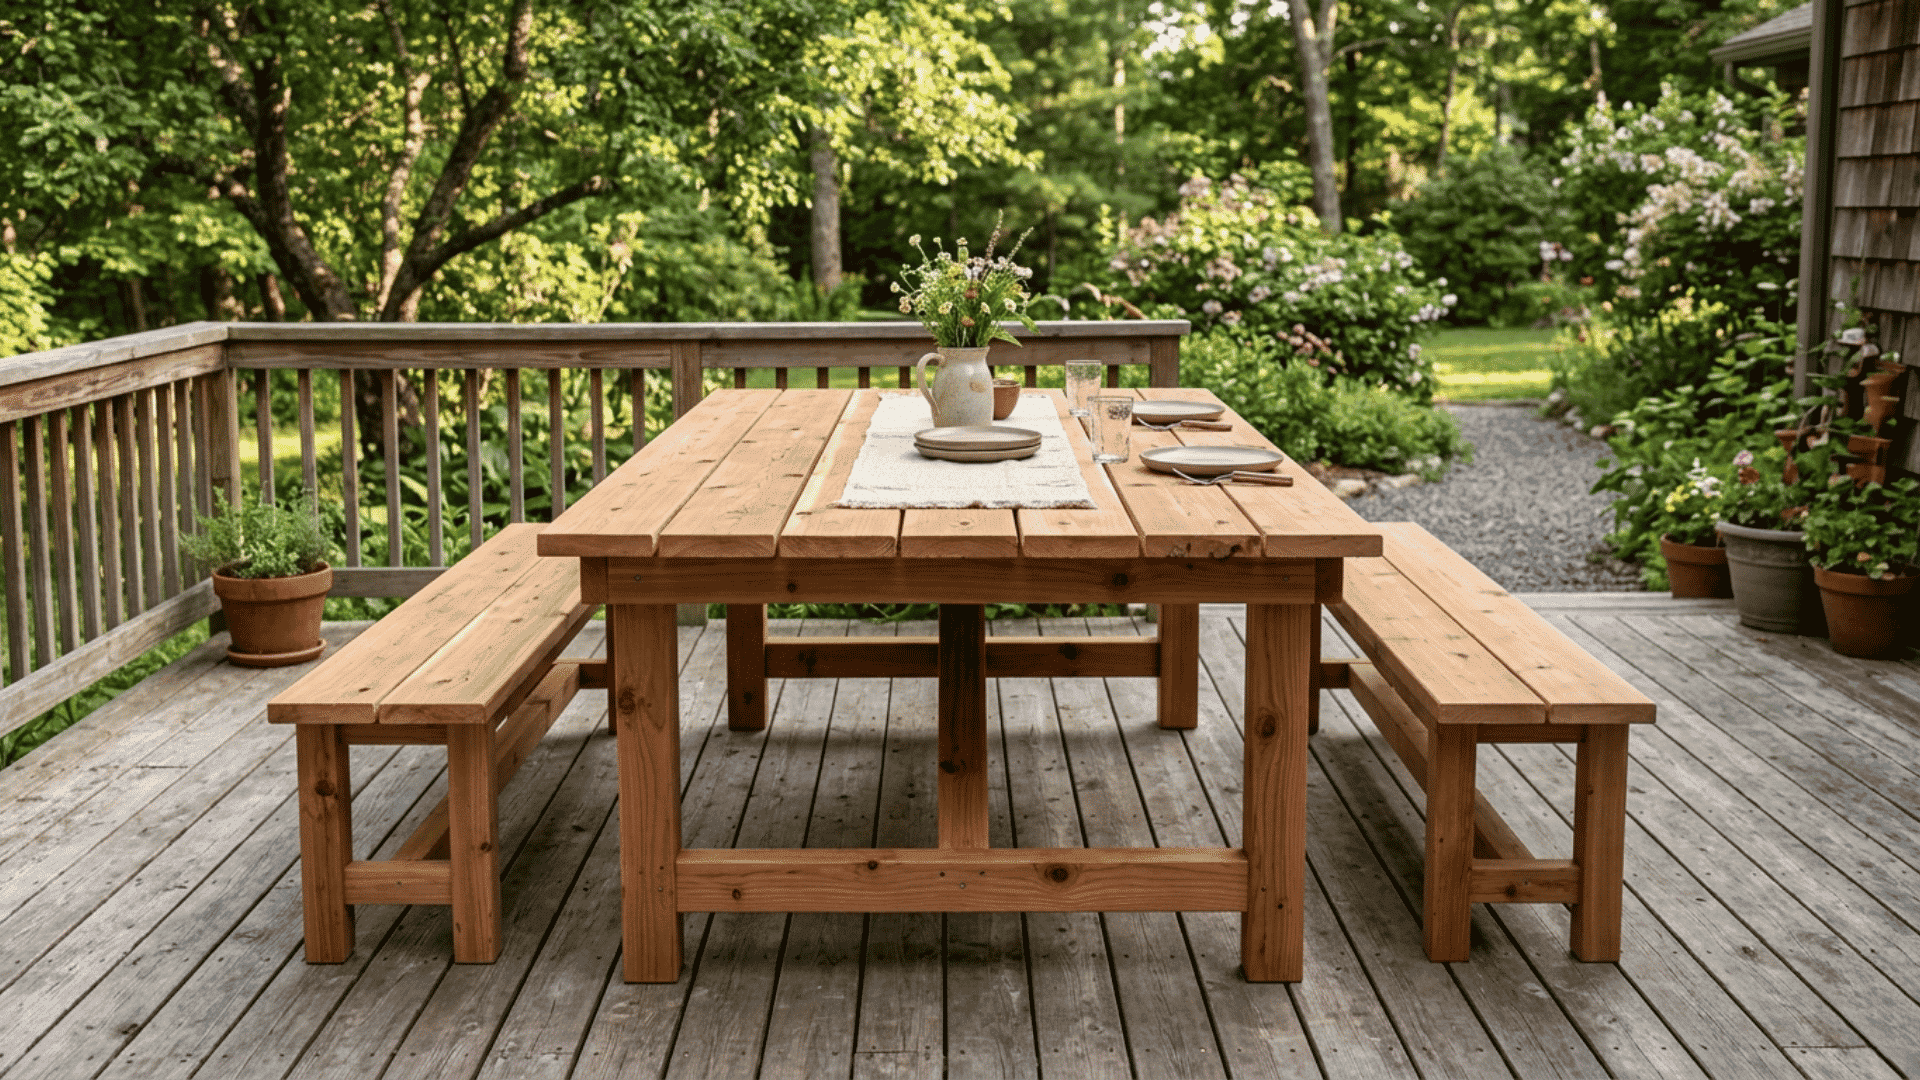
Skill Level: Beginner | Cost: ~$50–$100
Why stop at the kitchen? An outdoor dining table is one of the cheapest and fastest builds on this list. Use cedar, redwood, or pressure-treated pine and seal it well to handle rain, sun, and everything in between.
A friend built one for weekend backyard dinners, and it held up surprisingly well through rain and daily outdoor use.
Best for: Patios, decks, and backyard spaces
What You’ll Need
- Cedar or pressure-treated pine
- Circular saw
- Drill/driver
- Outdoor wood sealer
11. Drop-Leaf Space-Saving Table
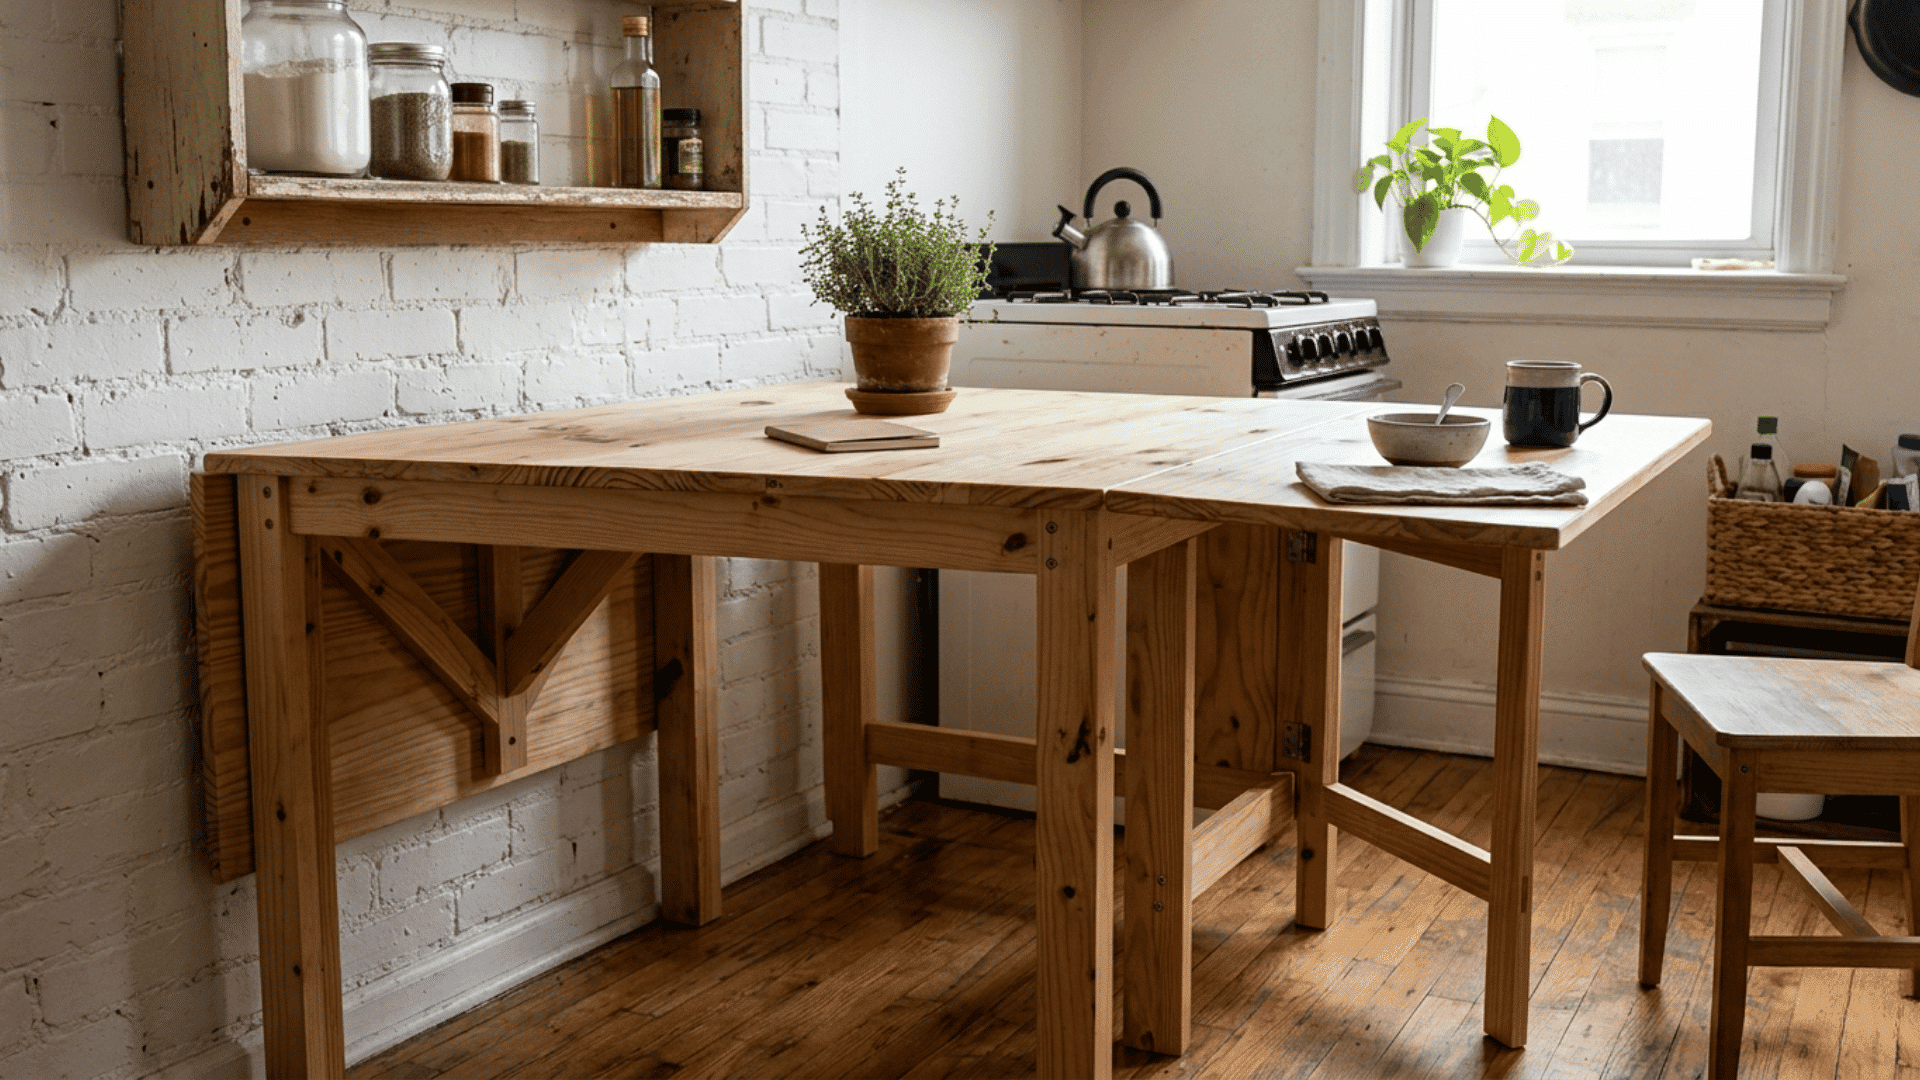
Skill Level: Intermediate | Cost: ~$150
Short on space? A drop-leaf table is your best friend. The folding sides expand when you need more room and fold down when you don’t.
It’s a smart, practical build that works perfectly in small kitchens and apartments.
I built one for a small dining area, and the foldable sides made everyday meals and extra guest seating much easier.
Best for: Studio apartments and small kitchen spaces
What You’ll Need
- 2×4 and 2×6 lumber
- Drop-leaf table hinges
- Folding leg brackets
- Drill/driver
Things to Keep in Mind
Keeping these simple tips in mind during the build process can save you time, prevent costly mistakes, and help you create a dining table that stays strong, beautiful, and functional.
- The Right Size: Standard dining table height is 30–31 “. Width typically runs 36–42”. Always measure your space first before cutting a single board.
- Pick the Right Wood:Pine is cheap and easy to work with, great for beginners. If you want a premium finish, go with oak, walnut, or maple.
- Finish It Properly:For table tops, use a wood stain followed by 3–4 coats of polycrylic. For bases, prime first, then apply 2–3 coats of paint.
- Allow for Wood Movement:Always use slotted holes when attaching the top to the base. Wood expands and contracts with seasons; if you don’t allow for this, your top can crack over time.
At the End
Building your own DIY kitchen table is one of the most rewarding home projects you can take on.
Not only can it save you hundreds or even thousands of dollars compared to store-bought furniture, but it also allows you to create something that perfectly fits your space, style, and daily needs.
If you love modern farmhouse, rustic, minimalist, or traditional designs, there’s a table idea here for every skill level and budget.
The best part is that you don’t need a professional workshop or years of woodworking experience to get started.
With a solid plan, a few basic tools, quality wood, and a free weekend, you can build a table you’ll proudly use for years.
Pick your favorite design, follow the tutorial, take your time with the process, and enjoy creating a handmade piece that becomes the heart of your home. Happy building!
Frequently Asked Questions
What Wood was Used for the New Tabletop?
Red Oak boards were used to create the new tabletop because they are durable, strong, and provide a more refined finish than Pine.
Why was the Dining Table Rebuilt?
The original table was rebuilt after a house fire and resized to fit a smaller dining space better.
Can Beginners Build this Dining Table?
Yes, this project is beginner-friendly if you have basic woodworking tools and some experience with measuring, cutting, and sanding.
Why is Sanding Important for the Tabletop?
Sanding smooths out uneven surfaces, removes glue residue, and prepares the wood for paint, stain, or a protective finish.